

What Insurance Do I Need for Paramedical Tattooing in the UK? | Kandor Co.
You need professional indemnity and public liability insurance that specifically covers paramedical tattooing, plus local authority registration for skin piercing and tattooing or special license.
Expect to pay roughly £150–£500 a year depending on provider, treatments offered and experience. Registration is typically a one off local authority fee.
Neither is optional, and doing one without the other leaves you exposed.

What Insurance Do I Need for Paramedical Tattooing in the UK?
You need professional indemnity and public liability insurance that specifically covers paramedical tattooing, plus local authority registration for skin piercing and tattooing or special license.
Expect to pay roughly £150–£500 a year depending on provider, treatments offered and experience. Registration is typically a one off local authority fee.
Neither is optional, and doing one without the other leaves you exposed.
The two types of cover, and why you need both
Professional indemnity covers claims arising from your professional work — a client alleging the treatment caused harm, or that it wasn't performed to a reasonable standard. This is the one that matters most in paramedical work.
Public liability covers injury or damage in your premises unrelated to the treatment itself the classic example being someone tripping over a cable.
Most beauty and aesthetics policies bundle both. Check yours does.
What insurers ask for
Evidence of training in each specific technique you offer. Your certificate needs to name what you actually learned.
Local authority registration, both premises and personal.
A consent process. Many insurers will review your consent form wording, and it's worth asking them to.
Record keeping to their standard, retained for their required period.
Infection control arrangements — sharps disposal, cleaning protocols, single use where required.
⚠️ You could always get your insurer to confirm that your qualification is acceptable to them, before you book training.
Local authority registration
Under UK legislation, skin piercing and tattooing require registration with your local council — typically both you as a practitioner and your premises.
What's usually involved:
An application and fee, varying by council
An inspection of your premises
Compliance with byelaws on hygiene and infection control
Displaying your registration certificate
⚠️ Requirements and fees vary considerably between councils.
CHECKLIST
Does my cover include every technique I've been trained in?
Am I covered for treating scar tissue, grafted tissue and irradiated skin?
Am I covered for areola and intimate-area work?
Am I covered for inkless / medical needling as well as pigment work?
Am I covered treating models at reduced or no cost?
Am I covered working at another practitioner's premises? Mobile? At a client's home?
Am I covered outside the UK?
What are your record retention requirements?
What's your notification requirement if a client complains?
Will you review my consent form wording?
What it costs
£150–£500 a year is the typical range for UK paramedical practitioners.
Specialist beauty and aesthetics insurers are usually significantly cheaper than large general insurers, and often more knowledgeable about the sector. Cost varies with treatments offered, turnover, experience and claims history.
What happens if you don't have it
No legal protection. A single claim can end a business, and paramedical work carries real risk
You may be trading illegally without local authority registration
Landlords and salons may refuse you. Most require proof before letting you work
Clients increasingly check
The mistakes that void cover
Treating outside your training. If you're not trained in it, you're not covered for it
Admitting liability or offering a refund before speaking to your insurer. Tempting and potentially very costly
Poor record keeping. No consultation record, no consent, no defence
Letting registration lapse
Treating a contraindicated client and documenting nothing
Frequently asked questions
Do I need insurance as a mobile practitioner? Yes
Do I need a licence to tattoo in the UK? You need local authority registration for skin piercing and tattooing. It's registration rather than a licence in most areas, but the effect is the same you can't legally practise without it.
Is CPD accreditation enough for an insurer? Usually, but confirm with your specific insurer before training. Requirements vary.
Do I need medical qualifications? No. Appropriate training, insurance and registration.
How soon after training can I get insured? Often immediately on presenting your certificate. Some insurers require evidence of supervised practical work — another reason to check before booking training.
What about working in the EU or elsewhere? UK policies typically don't cover work abroad. You'd need local cover, and local licensing requirements vary considerably by country and, in the US, by state.
Do I need separate cover for inkless needling? Check
⚠️ This is general guidance, not legal or insurance advice. Requirements vary by insurer, by local authority and over time. Verify everything with your own insurer and council.
Training with Kandor Co; every course covers insurance, local authority registration, consent and record keeping, and we'll introduce you to the insurer used by around 90% of our students.
How to Find Models for Your Camouflage Portfolio | Kandor Co.
The fastest routes are your existing client base, local support groups, and a clear public post explaining exactly what you're offering. The slowest route — and the one most new practitioners try first — is generic social media asking for "models."
Here's what actually works, in order.
Before you post anything
Get these in place first. A model day that goes wrong without them is a serious problem.
Insurance confirmed, including cover for treating at reduced or no cost
Local authority registration complete
Consent forms — treatment and photography, separately
How to Find Models for Your Camouflage Portfolio
The fastest routes are your existing client base, local support groups, and a clear public post explaining exactly what you're offering. The slowest route — and the one most new practitioners try first — is generic social media asking for "models."
Here's what actually works, in order.
Before you post anything
Get these in place first. A model day that goes wrong without them is a serious problem.
Insurance confirmed, including cover for treating at reduced or no cost
Local authority registration complete
Consent forms — treatment and photography, separately
A contraindication screening process you'll actually follow
Aftercare products and written instructions
A clear plan for what happens if the result isn't what either of you hoped
⚠️ Reduced cost work is still treatment. Every clinical and legal obligation applies exactly as it would to a paying client. "They were a model" is not a defence.
Where models actually come from
1. Your existing clients — the highest converting source by far.
If you already do PMU, beauty or aesthetics, some of your clients have scars, stretch marks or vitiligo they've never mentioned. They already trust you and they've already been treated by you.
"I've just trained in scar and stretch mark camouflage and I'm building my portfolio. I'm looking for a few people to treat at [no cost / a reduced rate] while I do. If you've got something you've been self conscious about, have a think — no pressure at all."
Send it individually. Never as a group blast.
2. A specific public post, not a vague one.
Vague posts get nothing. Specific posts get bookings.
Looking for camouflage models — [your town]
I'm building my portfolio in scar and stretch mark camouflage, so I'm offering treatment at [no cost / reduced rate] for a limited number of people.
What I'm looking for: mature scarring (12+ months), white or silver stretch marks, or stable vitiligo. All skin tones
What's included: full consultation, treatment, aftercare products and a follow-up session.
What I need from you: honesty about your medical history, and availability for a consultation beforehand and a review afterwards.
Photography is optional. You can decline entirely and still be treated* have a think about this one.. it is always best to take before and after imagery.
Message me if you're interested — I'll talk you through it properly first.
3. Support groups and charities.
Vitiligo, burns, breast cancer and visible-difference organisations often have local groups and newsletters.
⚠️ Approach carefully. Ask the organiser first, never post directly into a support group, and lead with what you're offering rather than what you need. Groups exist for support, not recruitment
4. Your own network.
Friends, family, colleagues. It's not cheating, it's how nearly every portfolio starts.
Screening — non-negotiable
Free treatment does not mean relaxed standards. If anything, screen harder: a model who develops a problem is exactly as serious as a client who does.
Before you commit to anyone:
Photographs of the area in natural daylight
A completed medical history and contraindication form
Confirmation that scarring is fully matured
Not pregnant or breastfeeding
No keloid tendency without specialist assessment
Realistic expectations, verified in conversation not assumed
A model you shouldn't have treated is worse than no model at all.
What to promise, and what not to
Do promise: full consultation, proper aftercare, a follow-up session, and honesty about what's achievable.
Don't promise: a specific result, a number of sessions beyond what's agreed, or free work indefinitely.
Be clear from the start about what happens after the free work ends. "This covers your first session and one review. Further sessions would be at [rate]" prevents a very awkward conversation later.
Photography
Written consent, always — separate from treatment consent
Let them decline photography entirely and still be treated. Say so up front
Same light, same angle, same distance, every time
Healed photos at 6–12 weeks are the ones worth having. Day-of photos prove nothing
Offer to crop or anonymise
Tell them they can withdraw consent later
How many models do you need
3 well documented cases with healed photographs beat 20 rushed ones.
Frequently asked questions
Should I charge models anything? Charging a nominal amount £30–£50 — covers consumables and dramatically reduces no shows. It also filters for people who actually want the treatment.
Am I insured to treat models? Check with your insurer specifically. Most policies cover it, but confirm rather than assume.
What if the result isn't good? Be honest, offer to correct it, and don't post it. That's the deal you made.
Can I use model photos in my marketing? Only with signed photography consent, and only in the ways they've agreed to.
How do I find models for areola work? Harder, and it needs particular care. Approach through breast care nurses, reconstruction support groups and gender clinics — always via an organiser, never by posting directly.
Scar Camouflage vs Laser vs Microneedling: Which Do You Need? | Kandor Co.
Scar Camouflage vs Laser vs Microneedling
They treat different things. Laser and microneedling change the scar's texture. Camouflage changes its colour contrast. If your scar is raised or indented, you need texture work. If it's flat but a different colour, you need camouflage.
Many people need both and the order matters.
Scar Camouflage vs Laser vs Microneedling
They treat different things. Laser and microneedling change the scar's texture. Camouflage changes its colour contrast. If your scar is raised or indented, you need texture work. If it's flat but a different colour, you need camouflage.
Many people need both and the order matters.
What each one actually does
Look at your scar and ask: is it a texture problem or a colour problem?
Texture — you can feel it. It's raised, indented, tethered or rippled. Even if it were exactly the right colour, you'd still see it in raking light.
→ Laser, microneedling or inkless. Camouflage alone won't help.
Colour — it's flat and smooth, but paler, darker, pinker or shinier than surrounding skin.
→ Camouflage. Laser and needling may improve tone slightly but they can't add colour to a scar that has none.
Both — very common, particularly with surgical scarring.
→ Texture first, camouflage after. In that order, always.
Why the order matters
Camouflaging first and resurfacing afterwards is the most expensive mistake in this field.
Laser and needling work by injuring the skin in a controlled way to trigger repair. Doing that to a camouflaged area disrupts the pigment you paid for — patchily, unpredictably, and often leaving you worse off than before.
Correct sequence:
Surgical revision if needed → heal fully, 6+ months
Laser or needling for texture → complete the course, heal fully
Camouflage for remaining colour contrast
Refresh camouflage every 1–3 years
If a practitioner suggests camouflage before you've finished resurfacing, ask them why.
Honest limits of each
Laser -Results vary considerably between individuals. Multiple sessions required. Some lasers carry real risk of hyperpigmentation on deeper skin tones — ask specifically about experience with your skin type. Cannot add colour to a white scar.
Microneedling - Gradual and cumulative. Doesn't restore pigment to depigmented scars. Little use on very mature, fully flat scarring.
Camouflage - Doesn't change texture at all. Semi-permanent, so needs refreshing. Requires fully matured scarring. Colour matching is genuinely difficult and frequently done badly on deeper skin tones.
What about creams and silicone?
Silicone sheets and gels have reasonable evidence for improving the appearance of raised and hypertrophic scars, particularly when used early and consistently. Cheap and worth trying.
Vitamin E, bio-oil and general scar creams — evidence is weak, particularly for mature scarring. They won't do harm and they won't do much.
Anything promising to remove scars is not being straight with you.
How to choose a practitioner for any of these
Ask to see healed results at six to twelve weeks, not day-of photos
Ask about experience with your specific skin tone
Ask what they can't achieve — a good answer is specific
Frequently asked questions
Which is best for a C-section scar? Usually camouflage, since most mature C-section scars are flat and paler than surrounding skin. If it's raised or tethered, texture work first.
Can laser remove a scar completely? No. Laser improves appearance; it doesn't remove scars.
Is microneedling the same as inkless MCA? The principle is similar, controlled microinjury to stimulate repair. MCA as used in camouflage practice is specifically adapted for scar tissue and striae.
Can I have camouflage after laser? Yes, once fully healed, usually at least eight to twelve weeks after your final laser session. Confirm with both practitioners.
What's cheapest? Camouflage usually, because it needs fewer sessions. But cheapest isn't the question — the right treatment is.
Can I have them at the same time? No. Complete one course, heal fully, then start the next.
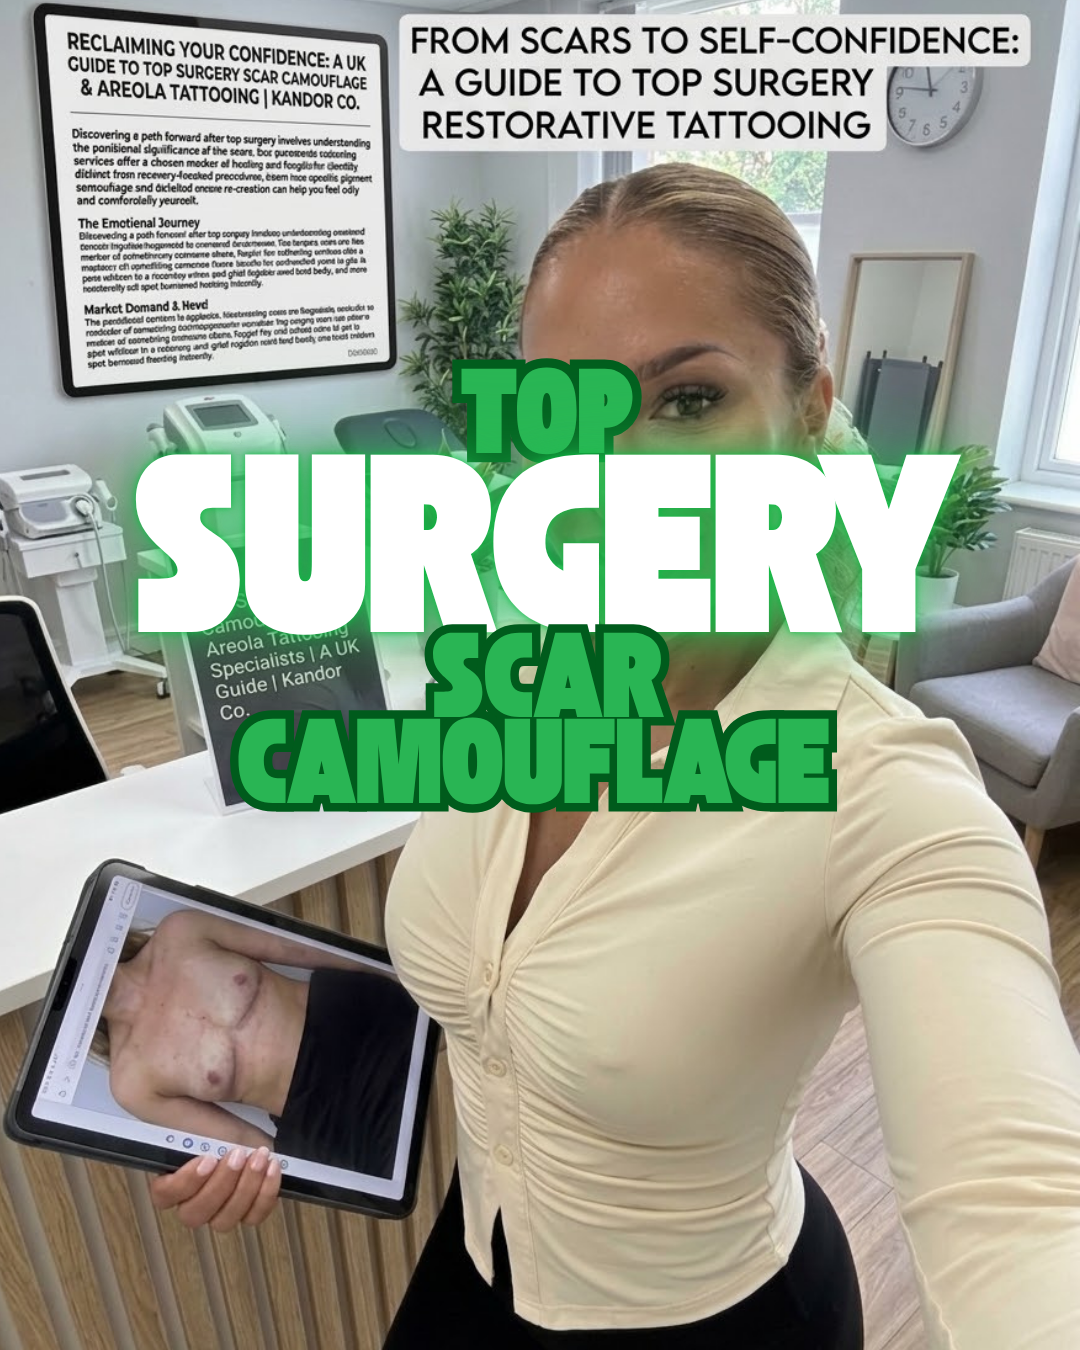
Top Surgery Scar Camouflage & Areola Tattooing: A UK Guide | Kandor Co.
After top surgery, two paramedical tattooing options are available: scar camouflage, which reduces the colour contrast between the chest scars and surrounding skin, and areola tattooing, which recreates or refines nipple and areola appearance using pigment, shading and highlight.
Most people are ready 6-12 months after surgery, once scars have fully matured. Areola work is sometimes possible earlier depending on healing.
Both are semi permanent, typically need two to three sessions and neither changes the scar itself — they change how visible it is.
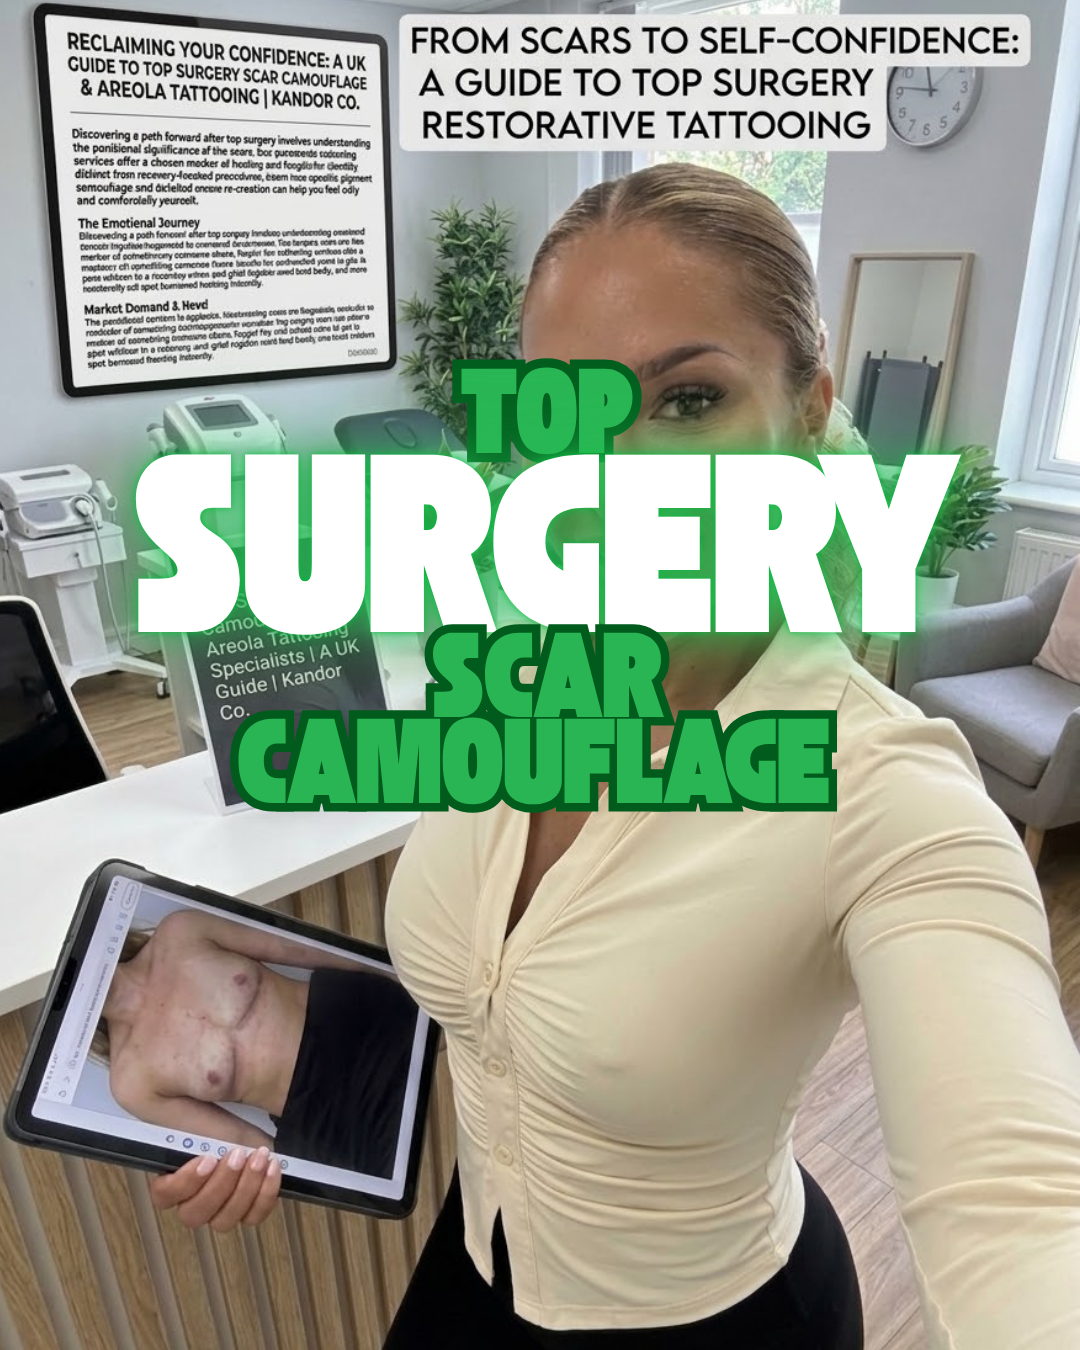
Top Surgery Scar Camouflage and Areola Tattooing
After top surgery, two paramedical tattooing options are available: scar camouflage, which reduces the colour contrast between the chest scars and surrounding skin, and areola tattooing, which recreates or refines nipple and areola appearance using pigment, shading and highlight.
Most people are ready 6-12 months after surgery, once scars have fully matured. Areola work is sometimes possible earlier depending on healing.
Both are semi permanent, typically need two to three sessions and neither changes the scar itself — they change how visible it is.
What scar camouflage does for top surgery scars
Double incision scars run horizontally across the chest and typically settle either lighter (hypopigmented) or darker and pinker (hyperpigmented) than surrounding skin. Periareolar and keyhole techniques leave less extensive scarring but can still leave visible colour contrast.
Camouflage works on the colour, not the texture. Medical needling targets texture and is used first if needed. Pigment is implanted to reduce the contrast so the scar line reads closer to surrounding skin rather than as a distinct band.
Areola tattooing after top surgery
Three situations come up most:
Nipple grafts that healed pale or uneven. Free nipple grafts frequently lose pigment during healing, sometimes substantially. Tattooing restores colour and definition, and can even out patchy retention. This is the most common request.
No nipple reconstruction. 3D areola tattooing creates the appearance of nipple and areola on a flat chest using shading and highlight. There's no raised tissue — the effect is optical, the way a painter makes a sphere look round on flat canvas. It's convincing in a mirror and in normal light.
Refining size, shape or position. Some people want a smaller areola diameter, a different shape, or better symmetry than surgery achieved. This is straightforward work and entirely reasonable to ask for.
When can I have it?
Scar camouflage: generally 6 to 12 months post-op. The scar needs to be fully matured — no longer pink or actively changing, softened, flat or stable. Treating an immature scar risks a poor result and further scarring.
Areola tattooing: often from 3-6 months, once grafts have fully healed and any swelling has resolved.
You're usually ready when:
All incisions are fully closed and healed
Scars have stopped changing colour month to month
Grafts, if you had them, are fully settled
Your surgeon is happy for you to proceed
No further chest surgery is planned
If revision surgery is a possibility, wait. Tattooing before revision means paying twice and potentially complicating the surgical field. Ask your surgeon directly.
On testosterone?: HRT is not a contraindication for paramedical tattooing. It can affect skin thickness, oil production and healing over time, which is relevant to how a practitioner assesses your tissue so mention it at consultation. Chest hair regrowth over a scar can also affect pigment placement and is worth discussing.
What happens at the appointment
Consultation first. Tissue assessment before any colour discussion — scar maturity, whether it's raised or flat, retention likelihood. For areola work, you'll decide size, shape and position, marked while you're sitting upright, because that's how you'll see yourself.
Colour matched to you. This is where practitioner skill separates. Areola colour is one of the hardest matches in medical tattooing, and pigment heals significantly lighter and cooler than it goes in. Warm tones drop out faster than cool ones, which is why so much areola work heals grey or ashy — and why it happens disproportionately on deeper skin tones, where an ashy result contrasts sharply against warm undertones.
Colour should be mixed in front of you, not selected from a chart.
The tattooing. Around 90 minutes for areola work; scar camouflage varies with scar length. Topical anaesthetic can be used. Many people have reduced sensation across surgical scars and feel pressure rather than pain.
Second session, 4–6 weeks later. Standard, not a sign anything went wrong. Scar tissue holds pigment unevenly and you can't know how much retained until it's fully healed.
Aftercare
Keep the area clean and dry
Apply the aftercare product as directed
No swimming, saunas, hot tubs or heavy sweating for two weeks
No gym sessions that soak the chest for two weeks — plan around it
Don't pick or scratch; flaking is normal
Avoid direct sun; high SPF once healed
Loose clothing, nothing that rubs
Surface healing takes around two weeks, full healing six to eight. Don't judge the result before six weeks. Almost everyone thinks it's too dark around day five and too light around day ten. Both are normal.
What it costs in the UK
Areola tattooing, both sides: £400–£800
Areola tattooing, single side: £250–£500
Top surgery scar camouflage: £250–£600 depending on scar length and sessions
Combined scar plus areola: usually quoted as a package
Refresh session: £100–£250
Ask specifically whether the follow-up session is included. A cheaper headline price with a chargeable second session often costs more overall.
On the NHS: areola tattooing is available in some areas as part of reconstruction pathways, though provision for top surgery specifically varies considerably by trust and is less consistent than for breast cancer reconstruction. Worth asking your surgical team — but expect to go private in most cases.
Choosing a practitioner
Ask to see healed work on top surgery specifically. Not mastectomy work, not brow tattooing. Chest scars and grafted nipples behave differently from anything else.
Ask about their experience with your skin tone. Ashy healing on deeper skin is a real and common failure. A good practitioner will raise it before you do.
Ask about graft tissue. Free nipple grafts hold pigment unpredictably. Someone who hasn't worked on grafts before will be learning on you.
Check they ask about your surgeon and any planned revisions. A practitioner who doesn't ask isn't being careful.
Check they're registered and insured. Local authority registration for tattooing, current professional indemnity.
Check how the consultation feels. You'll be undressed with this person. You should not have to explain or justify your surgery, correct anyone's language, or educate them. If you feel like the first trans client they've thought about, that's information — and there will be other practitioners.
Reasonable questions to ask outright: Have you worked with trans clients before? How many top surgery cases? Can I see healed photographs?
Realistic expectations
What good work does: substantially reduces scar visibility; restores colour to pale or patchy grafts; creates convincing areola appearance where there's none; improves symmetry.
Most people describe the result as the last item on a long list — the point where the chest stops being a project. That's a real and worthwhile thing, and it's also not the same as erasing the surgery.
Frequently asked questions
Can you tattoo over top surgery scars? Yes, once fully matured — generally 6 months onwards.
My nipple grafts healed really pale. Can that be fixed? Yes, and it's one of the most common requests. Tattooing restores colour and can even out patchy retention.
Can I get a 3D areola tattoo with no nipple reconstruction? Yes. The effect is created with shading and highlight and is convincing in a mirror and in normal light.
Does testosterone affect it? HRT isn't a contraindication. It can affect skin thickness, oil production and healing, so mention it at consultation.
Will chest hair be a problem? Regrowth over a scar can affect pigment placement. Raise it at consultation — it's manageable, but it changes the plan.
Does it hurt? Most people report pressure rather than pain, particularly where surgery reduced sensation. Topical anaesthetic is used if needed.
How long does it last? One to three years for scar camouflage, three to five for areola work, before a refresh.
Can I have it before revision surgery? Better to wait. Ask your surgeon — tattooing first can mean paying twice.
Do I have to explain being trans? No. A competent practitioner needs your surgical and medical history, the same as for any client. Nothing else is required.
Will you photograph me? Only with written consent, and you can decline entirely and still be treated. It is best to track your progess though!
Top surgery work at Kandor Co.
Kandor Co. offers scar camouflage and areola tattooing after top surgery, using the colour-mixing approach of the Kandor Protocol which matters here specifically because grafted and scarred chest tissue holds pigment unpredictably, and because pre-matched pigments routinely heal ashy on deeper skin tones.
Consultations are unhurried and clinical. You'll be told honestly if you're not ready. You won't be asked anything beyond the surgical and medical history any practitioner needs.
(top surgery scar tattoo, areola tattoo after top surgery, FTM areola tattooing UK, trans medical tattooing UK, nipple tattoo top surgery)
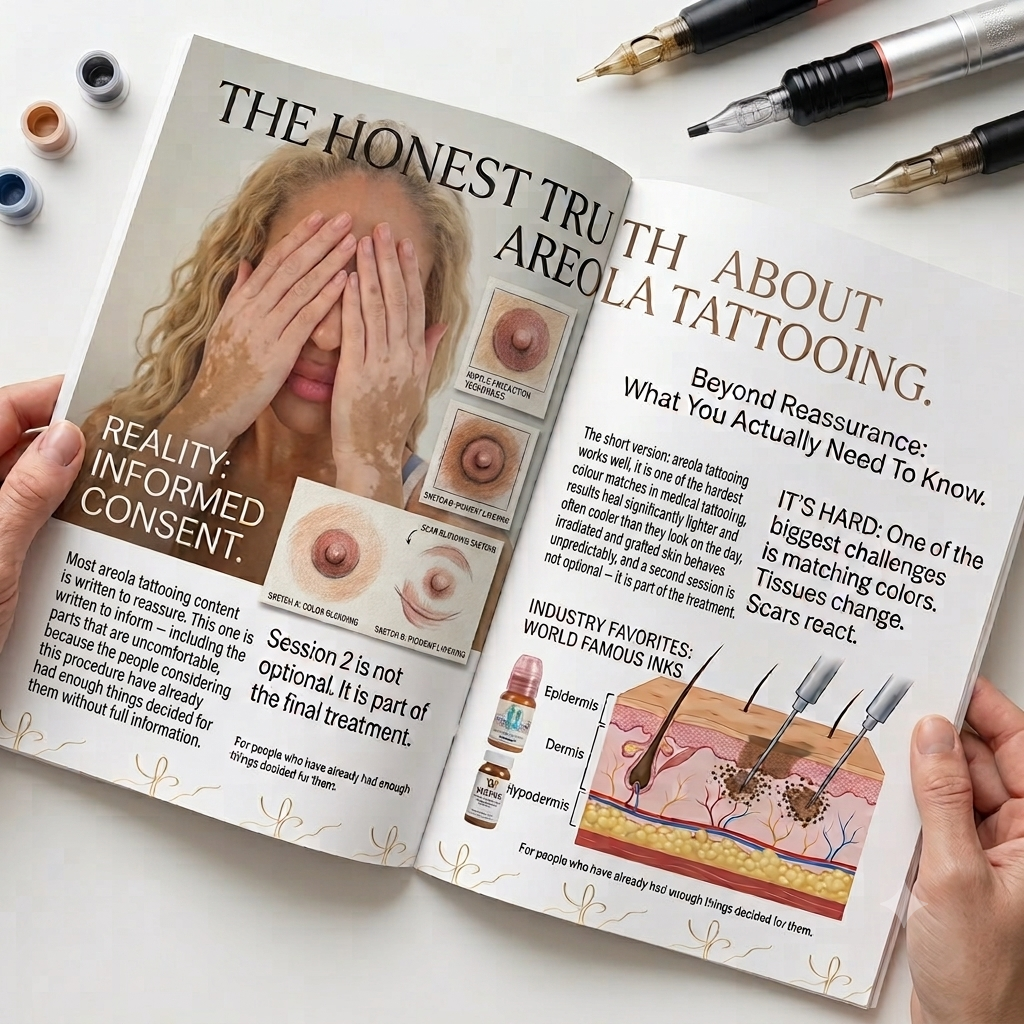
Areola Tattooing: The Honest Deep Dive Nobody Publishes | Kandor Co.
Most areola tattooing content is written to reassure. This one is written to inform — including the parts that are uncomfortable, because the people considering this procedure have already had enough things decided for them without full information.
The short version: areola tattooing works well, it is one of the hardest colour matches in medical tattooing, results heal significantly lighter and often cooler than they look on the day, irradiated and grafted skin behaves unpredictably, and a second session is not optional, it is part of the treatment.
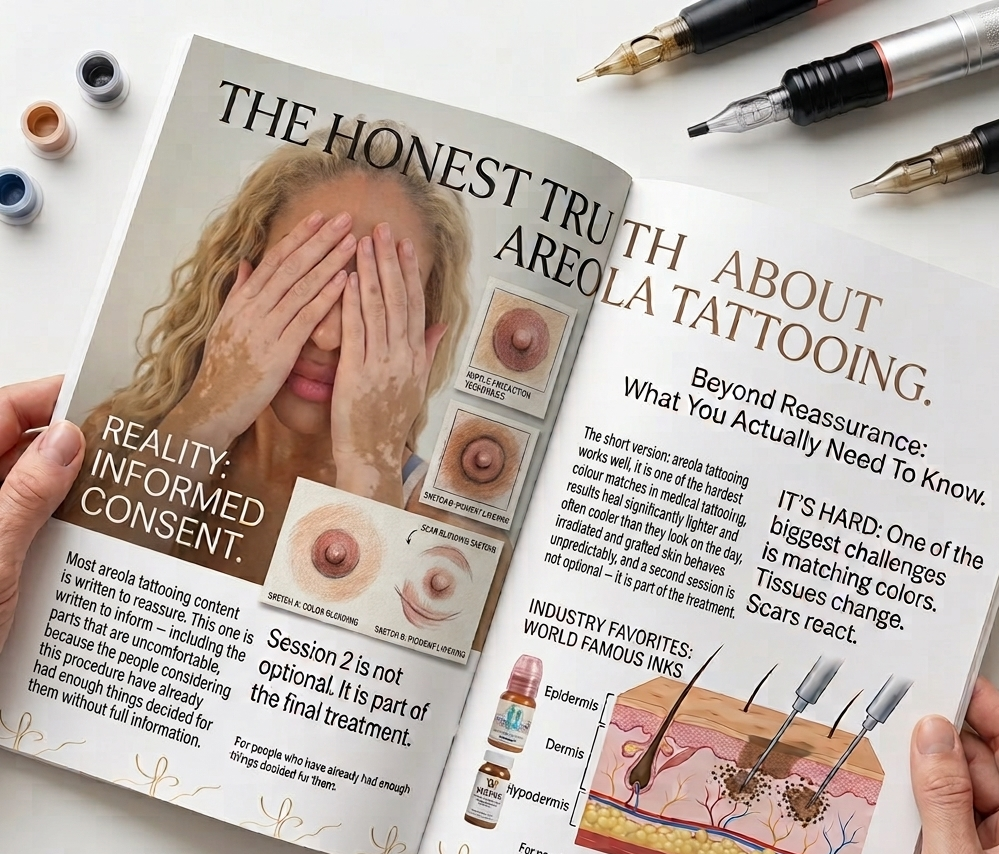
Most areola tattooing content is written to reassure. This one is written to inform, including the parts that are uncomfortable, because the people considering this procedure have already had enough things decided for them without full information.
The short version: areola tattooing works well, it is one of the hardest colour matches in medical tattooing, results heal significantly lighter and often cooler than they look on the day, irradiated and grafted skin behaves unpredictably, and a second session is not optional it is part of the treatment.
Why areola colour is genuinely difficult
Areola tissue is not one colour. It is a gradient usually deeper at the nipple, softening outward, with variation in undertone across the same small area. It is also more pigmented than the surrounding breast skin, meaning you are creating contrast rather than concealing it.
Then there is what happens after implantation.
Pigment heals lighter. Substantially. Fresh work looks intense and saturated; healed work is typically 30–50% softer. A practitioner matching for the day of appearance will produce an under saturated healed result.
Pigment heals cooler. Warm tones drop out faster than cool ones during healing. A mix that looks correctly warm on the day frequently heals grey, ashy or mauve. This is the single most common areola tattooing failure and it is a colour theory failure, not a technique failure.
It heals differently on different skin. On deeper skin tones, the cooling effect is more visible and more damaging to the result, because an ashy heal contrasts sharply against warm undertoned surrounding skin. This is why deeper skin tones are disproportionately represented among disappointing areola results — not because the procedure does not work, but because pigment selection is routinely taught around a narrow range of skin.
The fix is mixing rather than selecting, building the colour with warm correction deliberately over weighted to survive the healing shift. This is the core of the Kandor Camouflage Method and it is precisely why the Method exists.
Why results heal grey — and what should have happened instead
If an areola tattoo has healed grey, ashy or mauve, one of four things usually happened:
The pigment was too cool to begin with
Insufficient warm correction
The pigment was implanted too deep
A pre matched pigment was used
Can it be corrected? Usually, yes. Grey healing is generally correctable by overlaying warm corrected pigment at the appropriate depth, though it takes more sessions than getting it right first time and the result may be slightly less refined. A practitioner experienced in correction work is a different skill set from one doing original work — ask specifically.
Irradiated skin: the honest version
Radiotherapy changes skin permanently. Irradiated tissue is frequently thinner, less vascular, more fragile, and slower to heal. It also holds pigment less reliably and less evenly.
What this means practically:
Expect reduced retention — sometimes considerably
Expect at least one additional session, sometimes two
Expect patchier initial results that even out across sessions
A cautious practitioner will work lighter and build, rather than saturating
Some areas may never hold colour as densely as non-irradiated skin
None of this means you cannot have the treatment. It means your practitioner should assess the tissue properly, tell you this in consultation and price accordingly. A practitioner who does not mention radiotherapy effects at all has either not encountered them or is not telling you.
Grafted and flap reconstruction tissue
Reconstruction using tissue moved from elsewhere on the body (abdomen, back, thigh) brings skin with a different original colour, thickness and blood supply to the chest.
This affects everything. The base colour you are working over, how the pigment reads once healed and how the tissue accepts implantation. Donor skin from the abdomen is frequently lighter and differently toned than chest skin, so the practitioner is correcting for the underlying canvas as well as building the areola.
It is very achievable. It requires someone who understands they are painting on a different surface than they are used to.
Realistic limits — the things that are true
Symmetry is approximate. Natural bodies are not symmetrical. Reconstructed bodies less so. A skilled practitioner gets close; nobody gets identical.
The 3D effect is optical. It is convincing in a mirror and in most light. It is less convincing under direct overhead light at close range, because there is no actual raised tissue casting shadow. This is a physical fact, not a skill limitation.
There is no sensation restoration. Tattooing does not restore nerve function.
Colour fades. Three to five years typically, less on irradiated skin, less with sun exposure.
One session is not enough. Anyone offering a singles ession complete result is either inexperienced or overselling. Two or three is standard. Irradiated or grafted tissue often needs three sometimes four.
What good practice actually looks like
Position marked with you sitting upright, in a mirror, before any needle touches you
Colour mixed in front of you and tested, not selected from a chart
Warm correction explained, not just applied
Explicit discussion of how it will heal, including the panic stages
Written consent covering photography with a genuine option to decline
Your surgical or oncology team's agreement confirmed
A follow up session booked before you leave
Healed photographs available to view, at six to twelve weeks
If four or more of those are missing, keep looking.
WE ARE LOOKING FOR AREOLA TATTOO MODELS — Bedford & Nottingham
Kandor Co. is seeking models for areola restoration during our practitioner training days in Bedford and Leicester.
What this means for you:
The procedure is performed at a heavily reduced rate and sometimes no cost at all.
It is carried out by Keira and a trainee under her direct supervision at every stage
Full consultation, full consent process, full aftercare and aftercare product included
Follow up session included
Who we are looking for:
Post mastectomy, or breast surgery leaving you with no areola tissue or skin, with or without reconstruction
Flat closure clients very welcome
All skin tones
Existing areola tattoos that have healed poorly, for correction work
Fully healed, at least three to six months post final surgery, with your medical team's agreement
What we need from you:
Honesty about your surgical and treatment history
Availability for an online consultation beforehand and a follow up afterwards
Willingness to be in a room with a small number of people 1-3 — always with your explicit consent, and always with the option to say no
What we will never do: Rush you, pressure you, photograph you without written consent, use your images in a way you have not agreed to.
Click here to send us a message to be a model!
Applications are reviewed personally. You will speak to a human before anything is decided.
Why we use real models, and why we are open about it
Practice skins do not bleed, blanch, flush or heal. Irradiated tissue does all four in ways latex cannot simulate. A practitioner who has only worked on synthetic skin has never seen pigment lift unpredictably from grafted tissue, and will meet that for the first time on a paying client.
We are open about model recruitment because the alternative — practitioners quietly learning on clients who believe they are receiving standard treatment — is worse for everyone. If you model for us, you know exactly what is happening, you are supervised at every stage, and you are treated as a person doing us a favour, because you are.
Frequently asked questions
Why does my areola tattoo look grey?
Usually because the pigment was too cool or insufficiently warm corrected for how it would heal, or implanted too deep. It is generally correctable with warm-corrected overlay work by an experienced practitioner.
Can a bad areola tattoo be fixed?
In most cases, yes. Colour correction and reshaping are both possible. It takes more sessions than an original treatment. Look specifically for a practitioner who does correction work.
Why do I need two sessions of areola tatooing?
Pigment heals significantly lighter and retention is uneven, particularly on scar, grafted or irradiated tissue. The second session adjusts colour and depth once the true healed result is visible.
Is areola tattooing different on darker skin?
The procedure is the same; the colour work is harder and more frequently done badly. Warm correction matters more, because ashy healing contrasts far more visibly against warm-undertoned skin. Ask any practitioner directly how they mix for deeper skin tones.
How long after radiotherapy can I have areola tattooing? Generally at least six months, with your oncology team's agreement. Expect reduced retention and extra sessions.
Can I model if I have had a bad areola tattoo result elsewhere?
Yes — correction cases are genuinely valuable for training and we would welcome your application.
If you want to train in this: Kandor Co. teaches areola restoration as part of the Kandor Camouflage Method. ENQUIRE ABOUT TRAINING HERE.
Keira Walcott is the founder of Kandor Co. and developer of the Kandor Camouflage Method. She has lived with vitiligo since the age of fourteen. Kandor Co. is based in Bedford and trains paramedical camouflage practitioners across the UK and internationally.
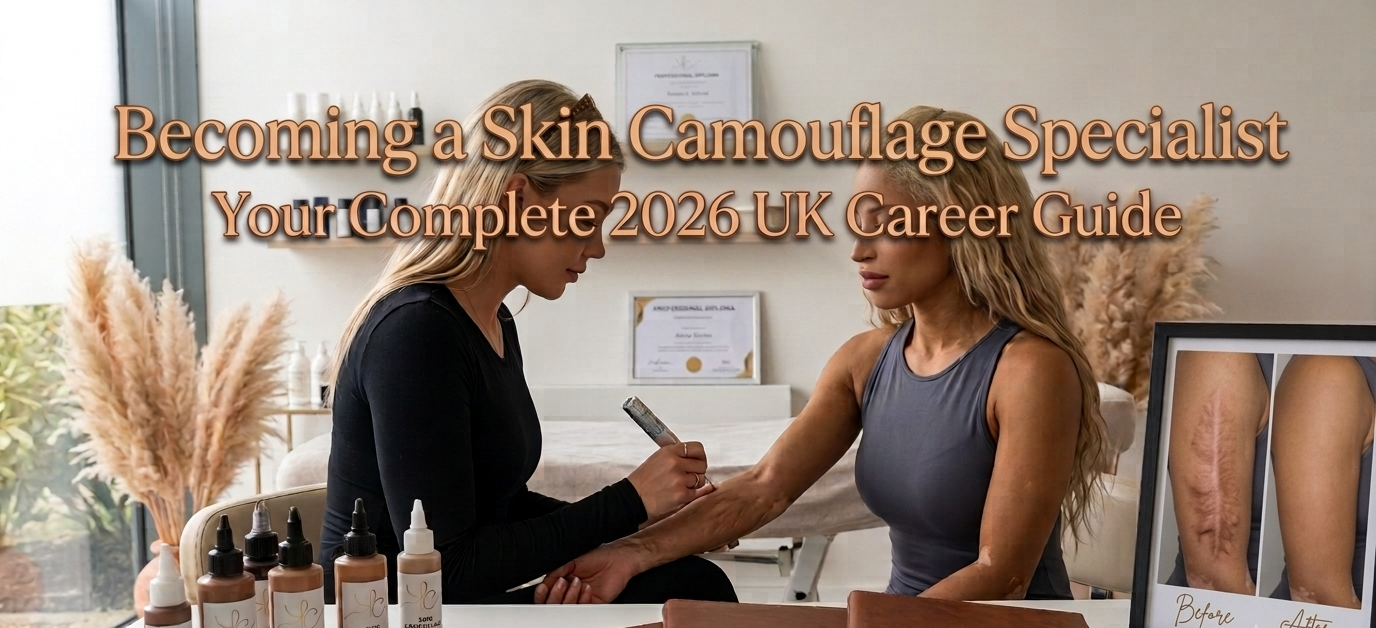
How to Become a Skin Camouflage Specialist in the UK — Complete 2026 Guide
Scar and stretch mark camouflage is one of the most rewarding and financially strong specialisms in UK beauty, permanent makeup & aesthetics. The demand from clients is real and growing. The number of trained practitioners is still small. And the emotional impact of the work — genuinely transforming how someone feels about their body and confidence is unlike almost any other treatment in the industry.
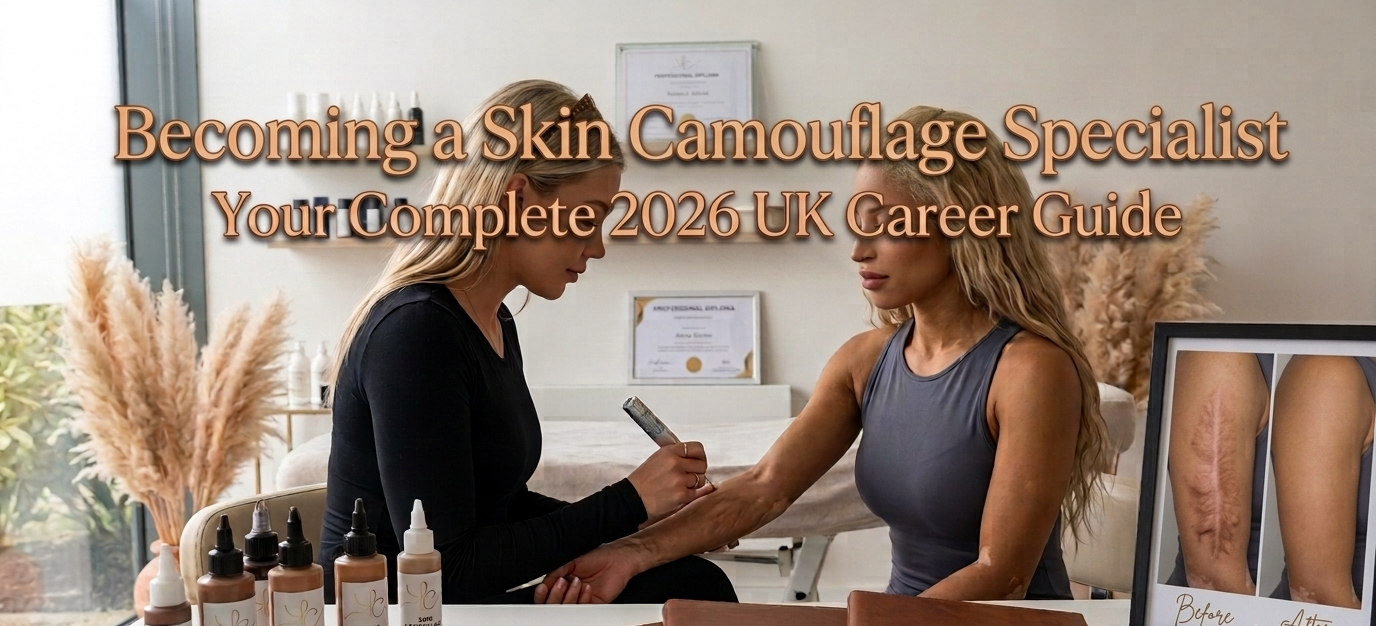
Scar and stretch mark camouflage is one of the most rewarding and financially strong specialisms in UK beauty, permanent makeup & aesthetics. The demand from clients is real and growing. The number of trained practitioners is still small. And the emotional impact of the work — genuinely transforming how someone feels about their body and confidence is unlike almost any other treatment in the industry.
This is the complete guide to becoming a skin camouflage specialist in the UK in 2026.
What Does a Skin Camouflage Specialist Do?
A skin camouflage specialist uses paramedical permanent makeup techniques to reduce the visible appearance of scars, stretch marks, vitiligo, birthmarks, and other visible differences. The work sits at the intersection of artistry, science, and emotional intelligence. You need technical skill in colour theory and needling technique. You need clinical knowledge of skin anatomy, healing, and contraindications and you need the ability to work sensitively with clients who are often emotionally vulnerable.
It is also one of the most financially rewarding specialisms in UK aesthetics. Packages typically sell at £600-£1,500. Clients are highly motivated. Referrals come naturally from powerful emotional outcomes.
The Two Methods — Ink and Inkless
The ink method involves selecting and custom mixing pigment to match the client's surrounding skin tone and implanting it into scar or stretch mark tissue. The pigment creates the visual appearance of normal skin colouring in areas that previously appeared white, depigmented, or discoloured. The most dramatic results for white scars and stretch marks and the most technically demanding method. The inkless or MCA dry needling method uses a fine needle configuration to create controlled micro trauma without implanting any pigment. This stimulates the skin's healing response and encourages natural melanin migration into depigmented areas. Particularly applicable to vitiligo, very fresh stretch marks, and cases where pigment implantation is not suitable. A practitioner trained and confident in both methods has significantly more versatility and can treat a wider range of clients.
Who Can Become a Skin Camouflage Specialist?
Existing PMU artists, beginners from another career path entirely or aesthetic practitioners. Main additions are specific colour theory, clinical knowledge of tissue types, and consultation skills for this emotionally significant treatment. The needling technique is new but fully learnable with quality training. For complete beginners — Kandor Co. is one of the few UK providers offering genuine beginner level training. No prerequisites required. The curriculum takes someone from no existing knowledge to a practitioner ready to begin taking clients.
Kandor Co. Training Options;
Inkless Scar and Stretch Mark Camouflage MCA Needling Course — £1,800. The inkless method as a standalone specialism.
Full Scar and Stretch Mark Ink and Inkless Masterclass — £2,800. The complete course — all methods, all skin tones, all scar types. The recommended route for practitioners who want to treat the full range of clients from day one.
Payment plans available. Klarna and Clearpay accepted.
What Happens After Training?
Weeks 1-4 — Portfolio building: Begin with model clients at a discounted rate. Aim for ten to fifteen strong case studies. This portfolio is your primary marketing tool.
Month 1-3 — First paying clients: Pricing at entry level while building confidence and consistency.
Month 3-12 — Building reputation: referrals begin from early clients. Social media content drives organic enquiries. Relationships with local surgeons and clinics generate medical referrals over time.
Year 2 onwards — Established specialist: you are the local reference point. Enquiries are largely self sustaining.
Insurance, Licensing, and Compliance Insurance:
You must hold valid professional indemnity and public liability insurance specifically covering scar and stretch mark camouflage before taking any paying clients. Standard PMU policies may not automatically include this — check explicitly. Kandor Co. connects all certified practitioners with appropriate insurance providers.
Local authority licensing:
Needling treatments in England currently require local authority registration under the Special Procedures licensing regime in most areas. Contact your local council's licensing department for specific requirements. Wales, Scotland, and Northern Ireland have different regulatory frameworks.
Data protection:
As a practitioner holding client health information, you are required to register with the ICO as a data controller. Annual registration costs £40-£60 for most small businesses.
Frequently Asked Questions
How long does it take to become a scar camouflage specialist?
The Kandor Co. Masterclass is one full hands on day after 2-3 weeks of hybrid learning — you leave certified granted you sucessfully treat your model. Building the practical experience to work at a high standard takes three to six months of consistent practice.
Can I add scar camouflage to an existing practice?
Yes — the most common route. Adding this specialism generates immediate premium revenue from your existing client base and referral network.
Is there demand in my area?
Almost certainly. Stretch marks affect approximately 80% of women and 40% of men in the UK. Surgical scars are ubiquitous. Vitiligo affects 1-2% of the population. Demand is there in every area — the limiting factor in most locations is the supply of trained practitioners.
Will I get support after training? Yes. All Kandorco certified practitioners access a free trial of Kandor co Pro — ongoing case support, monthly live review sessions, directory listing, and a network of fellow practitioners

How Much Can You Earn As A Scar & Stretch Mark Camouflage Specialist UK? 2026 Guide
If you're researching scar and stretch mark camouflage as a career or add on to your existing practice, one of the first and most important questions you're asking is what you can actually earn. It's the right question.
And the honest answer is significantly more interesting than most people expect.

If you're researching scar and stretch mark camouflage as a career or add on to your existing practice, one of the first and most important questions you're asking is what you can actually earn. It's the right question.
And the honest answer is significantly more interesting than most people expect.
Why Scar Camouflage Sits at the Top of the Aesthetic Earnings Range;
Most aesthetic treatments exist in a competitive market. Brows, lashes, nails, facials — these are services clients can access from multiple providers in any town.
Pricing is constrained by competition. Scar and stretch mark camouflage operates in an almost entirely different dynamic. The number of trained practitioners in the UK is still small. In most towns and cities, there are few or no practitioners offering this treatment. Supply is genuinely limited relative to demand. The client seeking scar camouflage has often been living with their visible difference for years or decades. They are not comparing you to the salon down the road on price. They are measuring the cost against years of limitation and self-consciousness. This creates pricing power that almost no other aesthetic treatment enjoys.
What Practitioners Are Actually Charging;
Newly certified practitioners — portfolio building stage: £150-£300 per session.
Established practitioners — 6-18 months post-certification: £300-£500 per session.
With a portfolio demonstrating consistent results, pricing at this level is supportable and expected. Experienced specialists — strong portfolio, clinical positioning: £500-£800+ per session, or £1,200-£2,500 per package.
Practitioners who position themselves as clinical specialists and have referral relationships with surgeons and dermatologists command the highest prices.
Why the Package Model Changes Everything
Single-session pricing is the least efficient way to price scar camouflage. Most treatments require two to three sessions for complete results. Selling a three-session package upfront: increases revenue per client significantly, secures client commitment to completing the treatment course, aligns with the clinical nature of the treatment, and reduces administrative burden. The maths: one session at £350 is £350. One three session package at £900 is £900. Same client. Same appointment time for session one. Three times the revenue. The large established players in aesthetics such as — Kandor Co (us), Este Medical, sk:n clinics to name a few — sell packages only. Single session pricing is not offered or only as a one off. This is not arbitrary. It is good business and appropriate clinical practice simultaneously.
Real Income Projections
Part time, one day per week, newly certified: two packages per month at £800 = £1,600 additional monthly revenue.
Annual: £19,200 from one treatment type, one day per week.
Part time, one day per week, established (12 months in): three packages per month at £1,000 = £3,000 additional monthly revenue. Annual: £36,000.
Full time specialist practice: six packages per month at £1,200 = £7,200 per month. Annual: £86,400 .
Training Investment vs Return The Kandor Co. Ink & Inkless Camouflage For Scars & Stretch Marks Full Masterclass
Priced at £2,800, a practitioner who takes on two packages per month at £800 each, a conservative early target — generates £1,600 in the first month. The training investment is recovered in under two months of working. Everything beyond month two is pure profit on a skill you own permanently and a specialism that compounds in value as your portfolio grows.
The Advantage of Being First in Your Area
The UK scar camouflage market is still early. When you are the only trained scar camouflage specialist in your area, you do not compete on price. You are the only option. Clients travel to you. Referrals build naturally. Your position becomes increasingly defensible as you build your portfolio. In two to three years, as more practitioners train in this specialism, the market will be more competitive. The practitioners who built their reputation and referral network in the early phase will have a significant and lasting advantage.
Frequently Asked Questions
How quickly can you start earning after training?
Most practitioners take their first paying client within two to four weeks of completing training.
Is scar camouflage a viable full-time income?
Yes. At full time treatment volume — six to eight packages per month — scar camouflage generates sufficient income to support a full time practice.
Do you need a studio or clinic space?
Not necessarily in the early stages. Many practitioners begin from a home studio. As your practice grows, a dedicated professional space supports premium positioning.
How do I get my first clients?
Social media content showing early case studies drives local enquiries. Outreach to local surgeons and dermatologists generates medical referrals over time

Skin Camouflage Training UK — What to Look For and What Nobody Tells You
Skin camouflage is one of the fastest growing specialisms in UK beauty & aesthetics, and one where the gap between a mediocre training experience and a genuinely transformative one is wider than almost any other treatment category. The number of training providers in this space is increasing rapidly. Choosing the right course before you spend £2,000-£4000 or more and invest your time is more important than ever. I'm Keira, founder of Kandor Co.
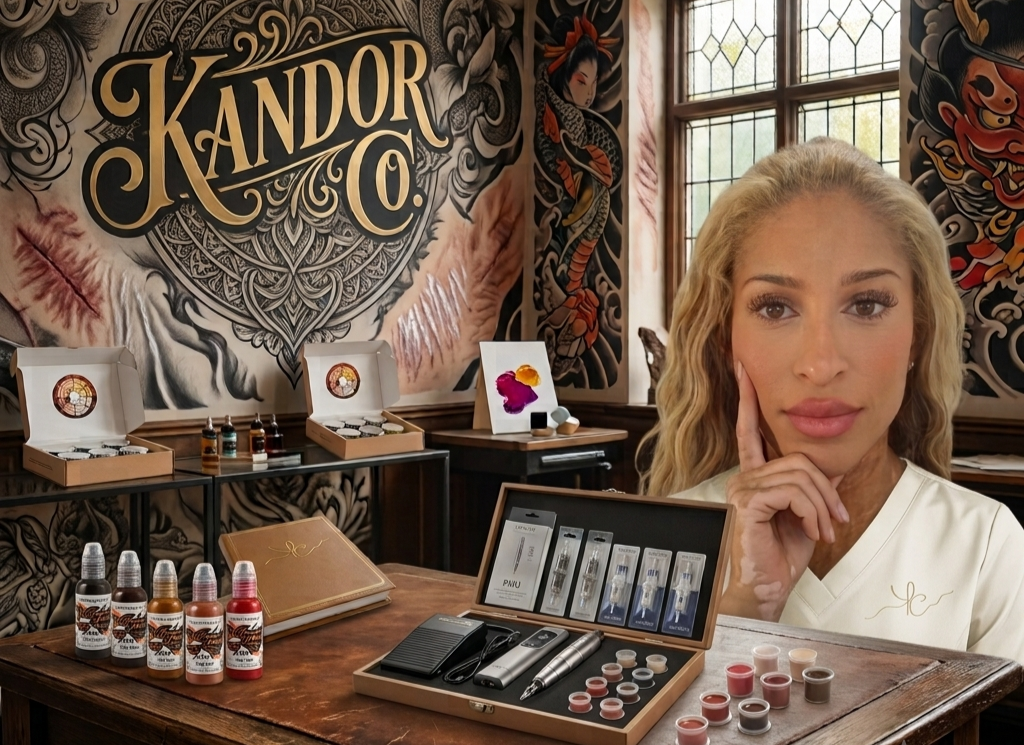
Skin camouflage is one of the fastest growing specialisms in UK beauty & aesthetics, and one where the gap between a mediocre training experience and a genuinely transformative one is wider than almost any other treatment category. The number of training providers in this space is increasing rapidly. Choosing the right course before you spend £2,000-£4000 or more and invest your time is more important than ever. I'm Keira, founder of Kandor Co.
I've been delivering scar and stretch mark camouflage training to practitioners across the UK for several years. I have vitiligo myself and have been working in this specialism for over a decade. This is my honest guide to what to look for, what to ask before you book, and what most training providers won't tell you until after you've already paid.
What Is Paramedical Skin Camouflage? Paramedical skin camouflage — also called scar camouflage tattooing/ Brazilian camouflage/ medical tattooing or skin colour restoration, uses permanent makeup adjacent techniques to reduce the visible appearance of scars, stretch marks, vitiligo, and other visible differences by implanting skin tone matched pigment into the skin or using dry needling techniques to stimulate the skin's natural healing and pigmentation response. The ink method implants pigment matched to the client's surrounding skin tone into scar or stretch mark tissue, creating the visual appearance of normal skin pigmentation.
The inkless or MCA needling method uses dry needling to create controlled micro-trauma, stimulating the healing response and encouraging natural melanin migration into depigmented areas without implanting any pigment. A comprehensive training course teaches both.
The UK Market in 2026 — Why Now Is the Right Time; The UK beauty & aesthetic industry is valued at over £3 billion and continues to grow. Within it, paramedical and corrective treatments are one of the fastest growing segments. Scar and stretch mark camouflage sits in a particularly advantageous position: the number of trained practitioners is still small relative to demand. In most towns and cities, there are few or no practitioners offering this treatment. The practitioner entering this market now has the opportunity to become the local reference point before the market becomes competitive. The emotional value to clients is also extreme. Unlike a facial or brow treatment, scar camouflage often addresses years of visible difference and self consciousness.
Clients are measuring cost against years of limitation, not comparing you to the salon down the road. This creates pricing power that general aesthetic treatments rarely achieve.
What a Comprehensive Course Should Cover; Skin anatomy and wound healing — you cannot treat scar tissue safely without understanding how it forms and heals. This is the foundation. Pigment and colour theory — for the ink method, colour matching is the skill that separates average results from exceptional ones.
Needle configurations and machine settings — different tissue types require different parameters. Inkless versus ink method — when to use each, advantages and limitations of both. Scar and stretch mark type classification, assessing tissue quality, client suitability, and contraindications is essential.
Health and safety protocols specific to needling treatments. Aftercare protocols and client management — aftercare significantly affects results. Hands on practical training with live models, theory without practice is insufficient. Business and marketing guidance, knowing how to attract your first clients is as important as the technique.
Kandor Co. Training — What's Included The Kandor Co. Full Scar and Stretch Mark Ink and Inkless Masterclass covers everything a practitioner needs to begin working professionally even as a beginner coming from a full time job in another industry.
Curriculum: introduction to skin camouflage, health and safety, risks and contraindications, skin anatomy and healing, needle configurations and machine settings, inkless versus ink method, skin and scar type classification and assessment, colour theory and pigment matching, reactions and removal, aftercare protocols, client consultation process with ready to use forms, live model practical work, social media and marketing for your new service, framed certification, post course support through Kandorco Pro.
Inkless MCA Needling Course — £1,800. Full Ink and Inkless Masterclass — £2,700. FULL KIT, MODEL AND MACHINE INCLUDED. Group, custom and refresher training available upon request.

Payment plans available, Klarna and Clearpay accepted.
What Separates Good Training From Great Training
The trainer's personal experience. Is the course taught by someone with extensive personal and clinical experience with the actual conditions being treated?
Post course support — what happens after the training day?
Kandorco certified artists access Kandorco Pro: a professional community with monthly live case review sessions, ongoing support, and a network of fellow practitioners.
Insurance and accreditation compatibility — your certification needs to be recognised by insurance providers. Kandor Co. connects all students with appropriate insurance providers. The referral network — Kandorco certified artists are listed on the Kandorco directory, visible to clients searching for this treatment nationally. We have referred clients to newly certified practitioners within days of training completing.
Questions to Ask Before Booking Any Course;
What is the trainer's own clinical background in this specialism?
What post-course support is included and for how long?
Can you connect me with an insurance provider who covers this treatment for your graduates?
Do you have a directory or referral network for certified practitioners?
What is your policy if I feel unprepared after the training day? Can I speak to a previous student before booking?
Frequently Asked Questions;
Do I need existing PMU experience?
With most providers, yes. With Kandor Co, no — one of the very few UK providers offering genuine beginner level training.
How long does it take to qualify?
The Masterclass is a one day intensive hands on, after a few weeks of hybrid learning. You leave with your certification and everything needed to begin taking clients, given a satisfactory model undetaken.
Is Kandor Co. training CPD accredited?
Yes — training is CPD accredited, counting toward your continuing professional development record.
What equipment do I need after training? A permanent makeup machine, appropriate needle cartridges, pigments, and consumables. Kandor Co. gives you all this for free, enough for a year of clients
How quickly can I start taking clients?
You can begin taking clients immediately after certification!
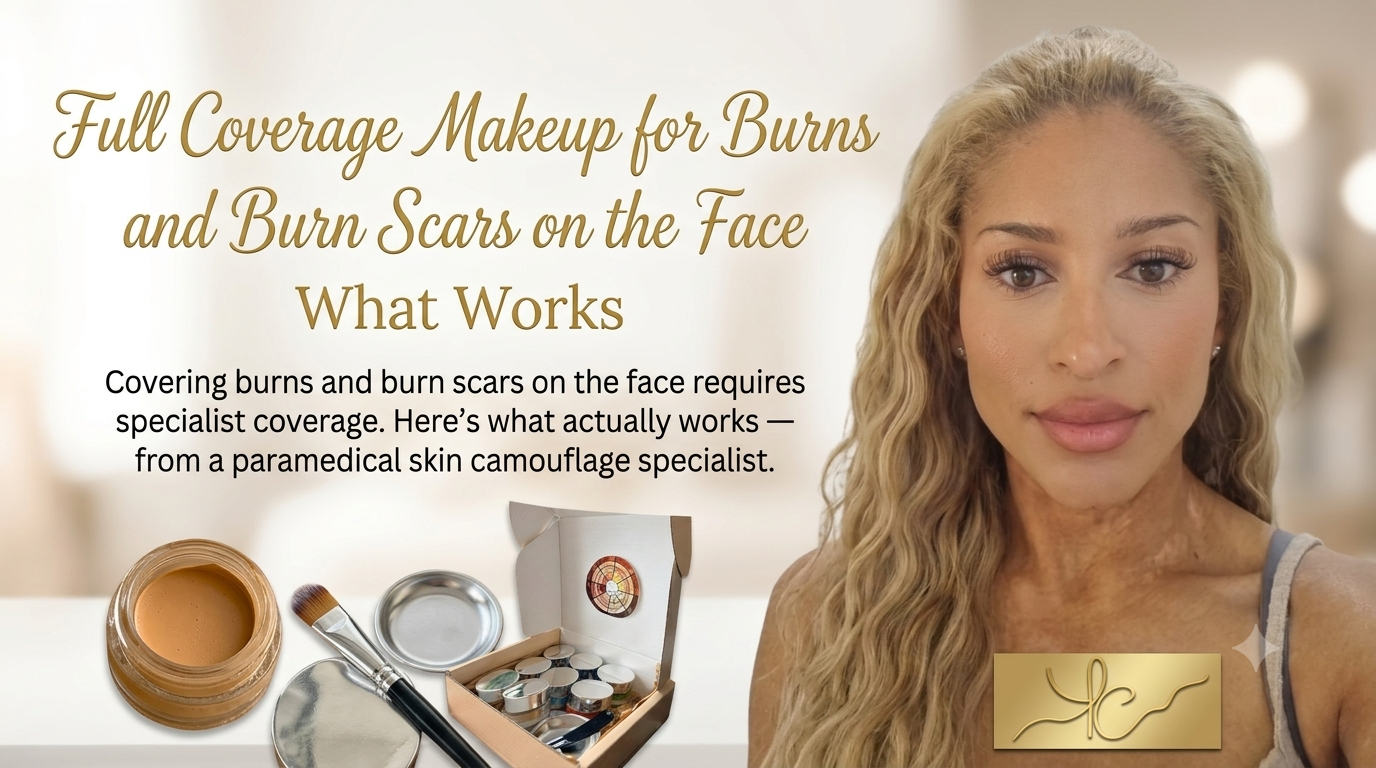
Full Coverage Makeup for Burns and Burn Scars on the Face — What Works 2026
Covering burns and burn scars on the face is one of the most challenging applications in skin camouflage — and one of the areas where finding genuine, useful information is hardest. Most makeup guides are written for general skin concerns. Burns survivors navigating the specific challenges of covering textured, discoloured, or grafted facial skin are largely left to figure it out alone. I'm Keira, founder of Kandor Co. and a trained paramedical skin camouflage specialist. I've worked with clients covering burns, surgical scars, birthmarks, and vitiligo for over a decade. This is what I know works — and why it works — for covering burns and burn scars on the face.
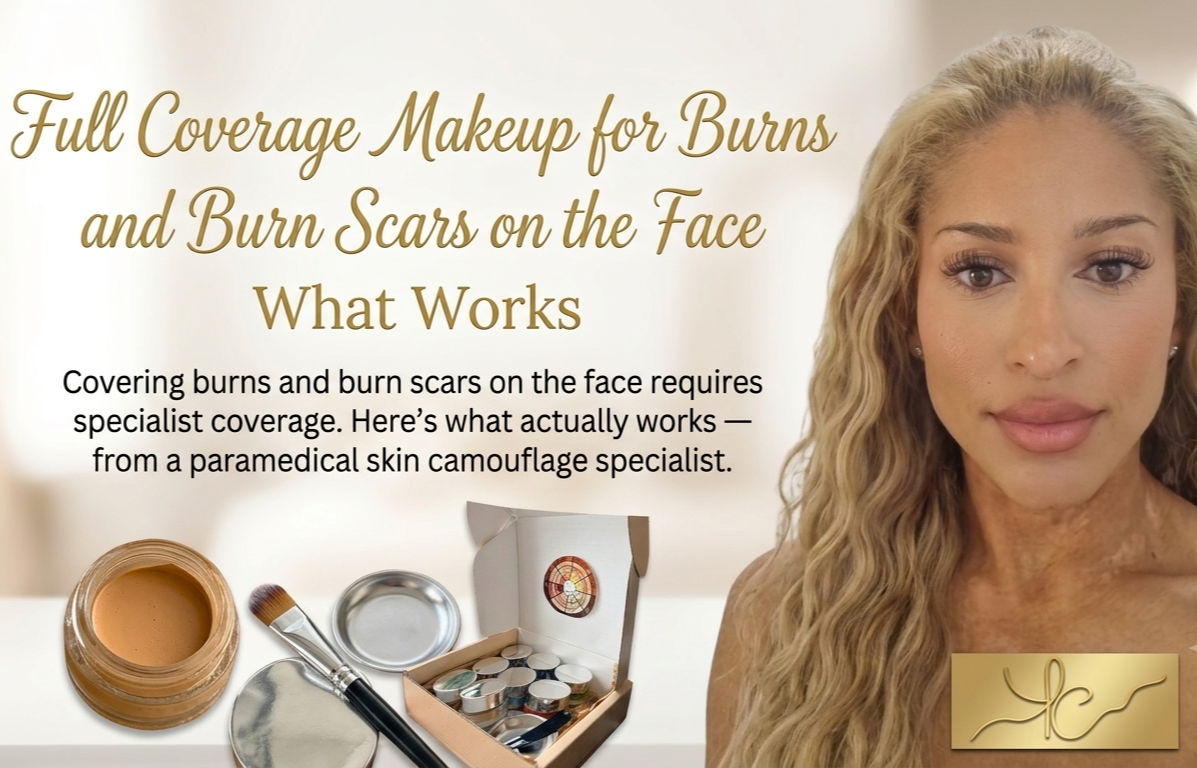
Covering burns and burn scars on the face is one of the most challenging applications in skin camouflage — and one of the areas where finding genuine, useful information is hardest. Most makeup guides are written for general skin concerns. Burns survivors navigating the specific challenges of covering textured, discoloured, or grafted facial skin are largely left to figure it out alone. I'm Keira, founder of Kandor Co. and a trained paramedical skin camouflage specialist. I've worked with clients covering burns, surgical scars, birthmarks, and vitiligo for over a decade. This is what I know works — and why it works — for covering burns and burn scars on the face.
Why Burns Coverage Is Different
Healed burn skin presents multiple challenges simultaneously that standard makeup is not designed to handle. Colour variation — burn scars rarely present as a single colour. Hyperpigmented regions, hypopigmented or depigmented areas, redness, and purple tones can all exist within the same scar. No single pre mixed shade addresses all of this. Texture changes — raised hypertrophic scarring, contracted tissue, grafted skin, and areas of uneven surface create challenges for coverage. Product settles into texture differently than smooth skin, and certain techniques will emphasise rather than minimise visible texture. Sensitivity — healed burn skin is often significantly more sensitive than unaffected skin. Products containing alcohol, heavy fragrance, or known irritants can cause discomfort. Sebaceous variation — burn scars often have different oil production characteristics, may be drier, and may behave differently throughout the day in terms of coverage breakdown. The Right Product for Burns Coverage The product category that works is specialist skin camouflage — with ultra high pigmentation, skin-compatible ingredients, and the ability to mix precisely to address the specific colour characteristics of a burn scar. The Kandor Camouflage Method Set was created for exactly this. Six colour adjusters give you the tools to address colour variation rather than trying to cover it with a single shade. The formula is free from alcohol and harsh fragrances and contains hyaluronic acid and vitamin E — supportive of sensitive skin.
Colour Correction for Burns — Why It Matters The most important technique for covering burns with redness or significant discolouration is colour correction — applying a corrective layer before your skin tone shade. Green neutralises red. Orange neutralises blue/purple tones. If you apply a skin tone shade directly over a red or purple burn scar without correction, the colour beneath influences the colour on top and prevents an accurate match. Process: assess the dominant colour of the scar. Mix a corrective shade using the Kandor adjusters — primarily green for red areas, primarily orange for purple blue areas. Apply this corrective layer first and allow to set.
Apply your skint one mix over the corrected base. The neutralised base allows your skin tone shade to read accurately. This two-stage process takes an additional two to three minutes and makes a significant difference for burn scars with colour variation. Technique for Textured Burn Scars Application motion matters more on textured skin. A firm, consistent patting motion presses coverage into texture rather than dragging it across the peaks. Warm the product slightly before application, working a small amount between fingertips for a few seconds makes it more pliable and allows it to conform to texture more naturally. Build multiple very thin layers rather than one substantial layer, on textured skin, thin layers read as skin, thick single applications catch light differently and look obviously applied. Set firmly and thoroughly — textured skin may have different oil production in different micro-areas.
Step by Step for Facial Burns Coverage Prepare the skin — cleanse gently, apply a light moisturiser and allow to absorb fully. Colour correct if needed, apply corrective layer to areas with significant redness or purple tones, allow to set briefly. Mix your skin tone shade using palette and adjusters, checking accuracy in natural light. Apply in sections — for large or complex coverage areas, complete one section fully before moving to the next. Pat consistently Throughout all application.
Blend edges carefully. very covered section needs edge blending into surrounding skin. Build gradually, two to three thin layers. Set firmly — pressed in loose powder over the entire covered area.
Frequently Asked Questions;
Can you fully cover burn scars with makeup? For most burn scars, specialist camouflage with correct technique achieves coverage undetectable in normal social situations. Texture, colour variation, and size all affect the achievable result.
Is camouflage makeup safe on healed burn scars? Yes, on fully healed scar tissue. The Kandor formula is free from alcohol and harsh fragrances.
Apply to fully healed skin only — never to open wounds or actively healing tissue. How do you cover red burn scars? Two-stage colour correction — green corrector to neutralise red, followed by skin-tone shade over the corrected base. Can makeup cover skin grafts? Grafted skin often has different texture and colour characteristics to surrounding skin. Specialist camouflage can cover grafted areas — the colour correction and thin-layer building approach is particularly applicable. What is the best makeup for burn scar coverage in the UK? A specialist skin camouflage product with high pigmentation and colour mixing capability — the Kandor Camouflage Method Set was designed for exactly this application
Ref; katiepiperfoundation.org.uk britishburnsassociation.org
How to Cover Vitiligo on Your Face Completely — Step by Step Guide 2026
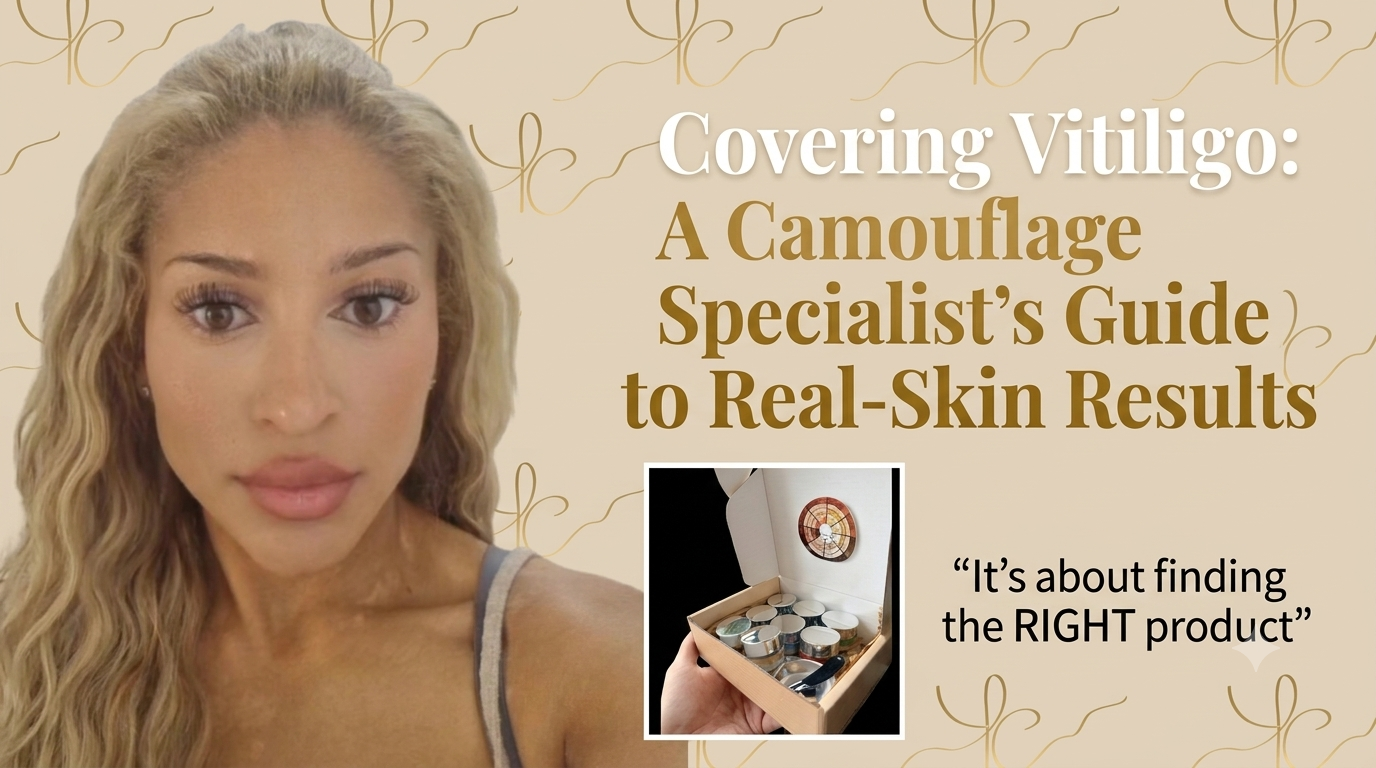
Most people who struggle to cover their facial vitiligo are not doing anything wrong. They are using the wrong product, and often they were never given the right information about what the right product actually is. This is the complete guide. Every step. Every mistake to avoid. Everything I know from personal and professional experience about covering vitiligo on the face. Why Facial Vitiligo Is Harder Than Body Vitiligo On the body, coverage can be heavier and less precise. Legs, arms, and torso are observed from a distance and in passing. The face is different. People look at it directly, from close range, in conversation, in photographs. The margin for error is smaller. The movement talking, smiling, all expressions stresses coverage in ways that body application doesn't encounter. And the emotional stakes are higher, because the face is where identity lives. The product and technique have to be better. This guide gives you both.
Covering vitiligo on the face is one of the most technically demanding things you can do with makeup and one of the most life changing when it works. I know this from both sides. I have had vitiligo since I was 11. I am also a trained paramedical skin camouflage specialist who has spent over a decade helping clients with visible differences, including vitiligo, burns, birthmarks, and scarring achieve coverage that genuinely looks like skin. Bonus tips on how to make it last.
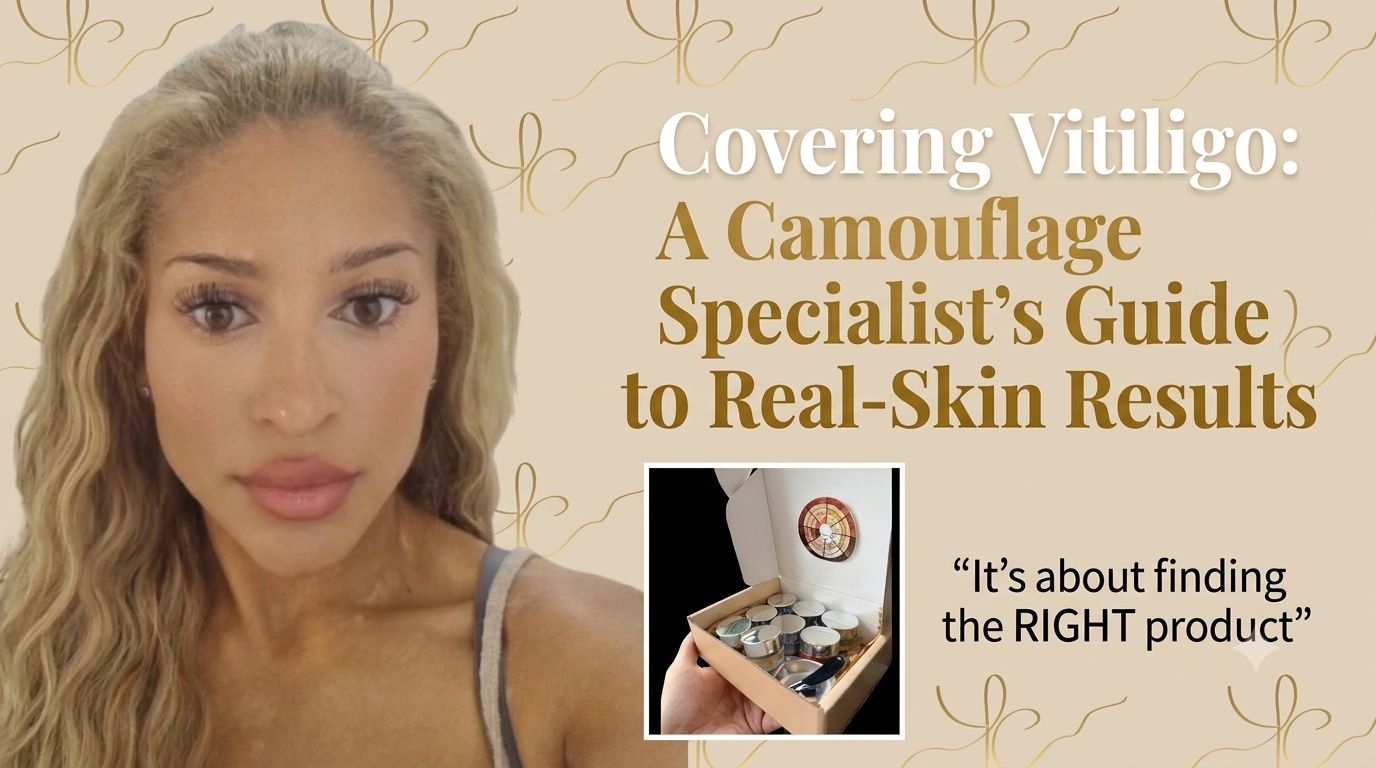
Most people who struggle to cover their facial vitiligo are not doing anything wrong. They are using the wrong product, and often they were never given the right information about what the right product actually is. This is the complete guide. Every step. Every mistake to avoid. Everything I know from personal and professional experience about covering vitiligo on the face. Why Facial Vitiligo Is Harder Than Body Vitiligo On the body, coverage can be heavier and less precise. Legs, arms, and torso are observed from a distance and in passing. The face is different. People look at it directly, from close range, in conversation, in photographs. The margin for error is smaller. The movement talking, smiling, all expressions stresses coverage in ways that body application doesn't encounter. And the emotional stakes are higher, because the face is where identity lives. The product and technique have to be better. This guide gives you both.
The Products You Need:
You need a specialist skin camouflage formula not a high street concealer, not a full coverage foundation. Specialist camouflage products are formulated with a significantly higher pigment load than standard cosmetics and offer customisable shade mixing that allows a truly precise colour match. The Kandor Camouflage Method Set was created specifically for this.
Three base shades plus six professional colour adjusters allow you to build an exact colour match for your individual skin tone. You will also need a loose translucent setting powder.
Before You Start — Preparation That Changes Everything.
Moisturise thoroughly. Vitiligo patches are often drier than surrounding skin. Any coverage product applied to dry or dehydrated skin will look patchy and break down faster. Apply a lightweight moisturiser and allow it to absorb fully forat least five minutes. Apply SPF if going outdoors. Depigmented patches have no natural UV protection and will burn significantly faster than surrounding skin. Work in natural light. The most common cause of inaccurate colour matching is matching under artificial light. Do your initial application either by a window or outdoors.
Step by Step — How to Cover Facial Vitiligo
Step 1 — Mix your shade: On the mixing palette, combine your closest base shade with colour adjusters in small amounts. Check against your surrounding skin in natural light until the mixed shade becomes genuinely difficult to distinguish from your skin.
Step 2 — Apply to the patch: Using a clean fingertip, apply the mixed shade to the depigmented area using a firm patting motion. Pat, not rub. Apply the first layer thinly.
Step 3 — Blend the edges: Using a very light touch, blend the outer edge of the covered area into surrounding skin using small circular movements. No visible line of demarcation. This is the step that makes coverage look like skin.
Step 4 — Build if needed: For deeper contrast patches, allow thirty seconds for the first layer to set, then apply a second thin layer followed by edge blending again.
Step 5 — Set with powder: Press loose translucent setting powder firmly into the covered area with a powder puff. Pressing motion, not sweeping. This locks coverage in place for all-day wear.
Step 6 — Continue with normal makeup: The camouflage layer is stable beneath any additional makeup.
Area-Specific Guidance:
Around the mouth — highest movement area. Apply most thorough setting here. Around the eyes — thinnest skin on the face. Apply with lightest possible hand. One very thin layer, blended carefully, set lightly. Across the nose — higher oil production. Thorough setting important. A primer before coverage extends longevity. Along the hairline and jawline — where coverage meets uncovered skin most visibly. Take coverage just slightly past the patch boundary and blend out gradually.
The Most Common Mistakes: Matching colour under artificial light — always use natural light. Using too much product — more product does not mean better coverage. Excessive application looks heavy and breaks down faster. Not setting — every person who has told me their camouflage doesn't last has not been setting properly. Skipping the edge blend, covered areas that look like makeup patches are almost always a blending failure rather than a colour matching failure. Using the wrong shade base — if your mix consistently looks wrong when it dries, you may be starting from the wrong base shade.
Frequently Asked Questions
How long does it take to cover vitiligo on the face? Once you have your colour formula established, 10-15 minutes. As you get faster with the technique, 7-10 minutes is achievable.
Can I cover vitiligo if I have oily skin? Yes. A mattifying primer before coverage and firm setting with powder in two light layers extends wear on oily skin.
Will camouflage makeup make vitiligo worse?
There is no evidence that correctly formulated skin camouflage makeup worsens vitiligo. The condition is caused by an autoimmune response, not by topical products.
How do I remove camouflage makeup?
Remove with a gentle oil-based cleanser or soap and water. Follow with moisturiser — particularly important for vitiligo patches.
Is there camouflage makeup for vitiligo on dark skin?
Yes — the Kandor Camouflage Method Set includes a Deep base shade and the orange and blue adjusters specifically support darker skin tone correction and matching.
ref; vitiligosociety.org
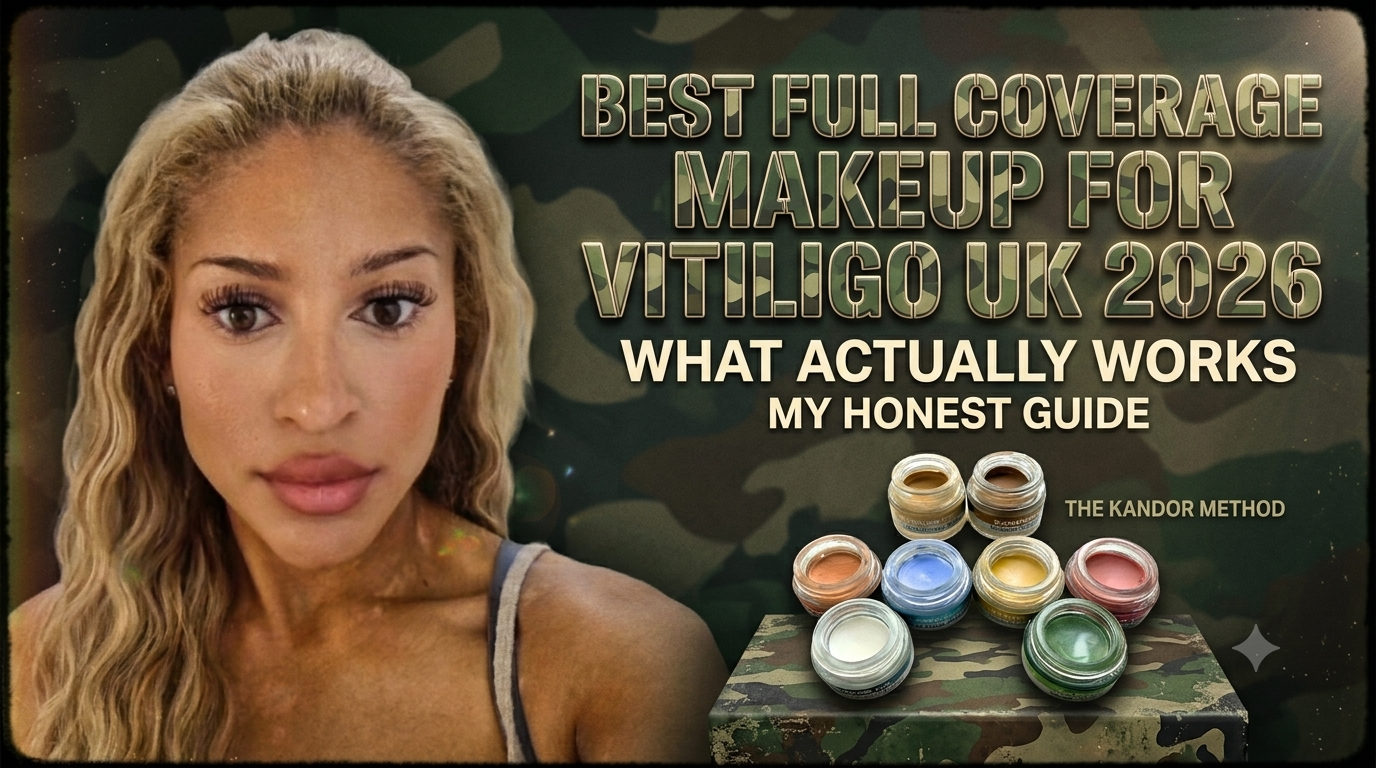
Best Full Coverage Makeup for Vitiligo UK 2026 — What Actually Works
Looking for the best makeup for vitiligo in the UK? From someone who has vitiligo and spent a decade perfecting coverage — here's what genuinely works on white patches, and other skin conditions and other visual differences for that matter!
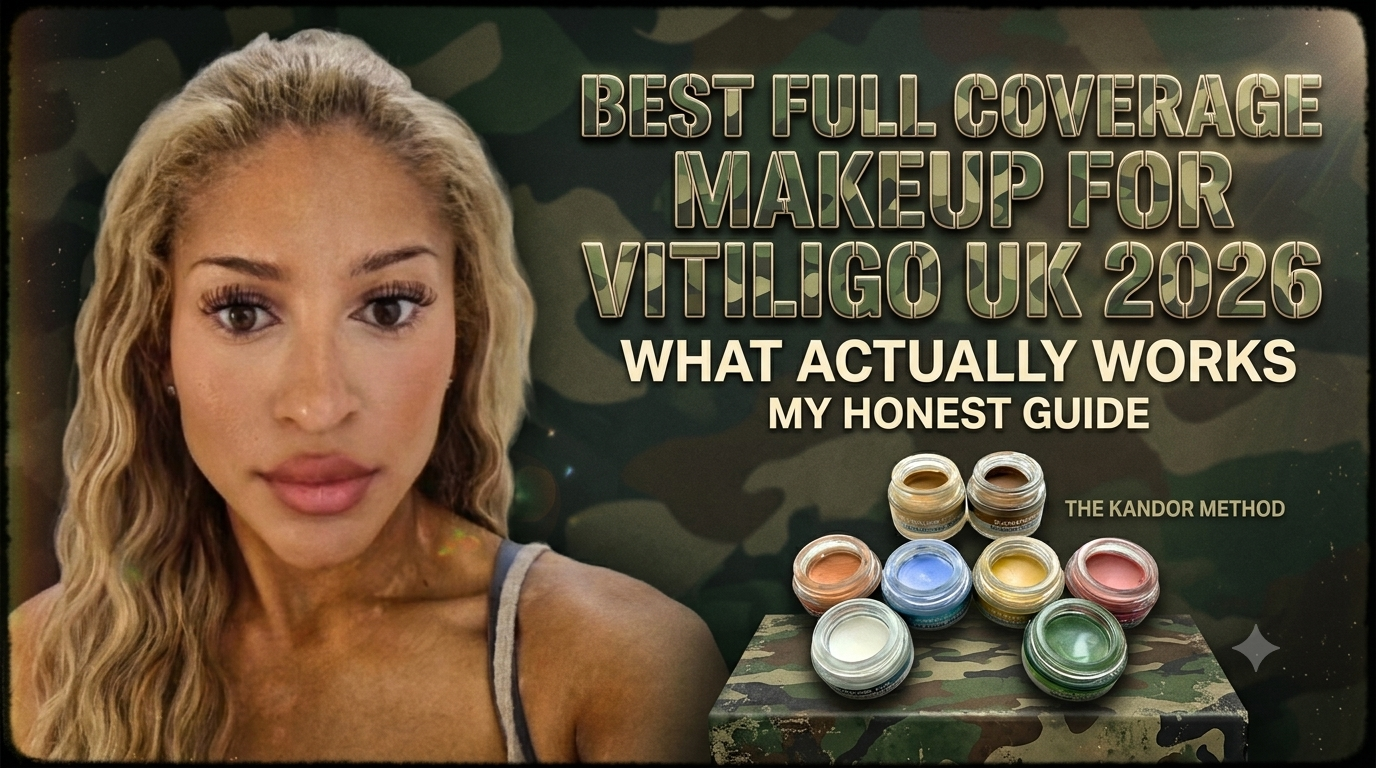
I've had vitiligo since I was 11. Not as a brand backstory. Not as a marketing angle. As a daily reality that shaped everything I went on to build professionally. When I was a teenager, the only makeup available for vitiligo came via prescription — thick, chalky clinical concealers that sat on the skin like wet plaster and fooled absolutely nobody. They didn't blend, didn't breathe, and didn't look anything close to real skin. Every morning I'd apply layers of this clinical camouflage over my white patches and acne scars and spend the rest of the day hoping the light didn't catch it wrong. I started experimenting early. Mixing those prescription products with face oils and serums, hunting for something that looked more like skin. Nothing worked the way I needed it to. So I eventually trained in advanced paramedical skin camouflage techniques, spent years refining my own methodology, and created the Kandor Camouflage Method Set — the coverage system I now use on my own face every day.

This is my honest, comprehensive guide to the best makeup for vitiligo in the UK in 2026. Not from a beauty editor. From someone who lives with the condition and has spent over a decade professionally helping others cover it.
What Makes Vitiligo So Difficult to Cover? Vitiligo is an autoimmune condition affecting approximately 1-2% of the UK population, Around 600,000 to 1.2 million people. It causes the immune system to attack melanocytes, the cells responsible for producing skin pigment, leaving depigmented white patches that have no natural colour of their own. This is the core challenge for makeup: you are not correcting a discolouration or evening a skin tone. You are creating colour where none exists, against the backdrop of your own natural skin tone. The contrast between a vitiligo patch and surrounding pigmented skin can be extreme — particularly in people with medium to deep skin tones and no standard foundation formula has the pigment density to bridge that gap convincingly. Add to this the fact that vitiligo patches vary in size, shape, and location; that affected skin often lacks natural sun protection; and that most mainstream products were never designed for this purpose, and you understand why "just use a good concealer" has never been an adequate answer.
Why Regular Foundation Doesn't Work: Standard foundations (even full-coverage ones) are formulated to even skin tone, not to create pigment from scratch. They contain insufficient pigment concentration to cover the white-to-skin contrast of vitiligo patches. Applied over a depigmented patch, even a full-coverage foundation will typically show the patch through the coverage, oxidise differently on unpigmented skin, and break down unevenly throughout the day. What vitiligo coverage requires is a fundamentally different product category: a specialist skin camouflage formula with ultra-high pigmentation, a precise colour mixing system that allows a truly custom shade match, and ingredients compatible with sensitive, unpigmented skin.
The Four Non-Negotiables in Vitiligo Makeup:
Ultra high pigmentation — the formula must contain significantly more pigment than any standard cosmetic. This creates genuine coverage rather than a translucent wash of colour. Customisable shade mixing, no two people have the same skin tone. A product that lets you mix base shades with corrective adjusters, controlling warmth, coolness, lightness, depth and undertone, will always outperform a pre-mixed shade. Skin-compatible ingredients vitiligo skin is often sensitive and lacks natural sun protection. The best formulas contain beneficial ingredients that support skin health rather than simply sitting on its surface. A natural, skin-like finish high coverage does not have to mean heavy texture. The goal is skin that looks like skin, not a painted surface. The Kandor Camouflage Method Set…was created specifically to address every limitation encountered personally and professionally in vitiligo coverage. Three professional base shades — Pale, Medium, and Deep — covering the full spectrum from very fair to deep skin tones. These are your starting point, not your endpoint.
Six professional colour adjusters. White, green, yellow, blue, orange, and pink. Green cancels redness. Orange neutralises purple and blue tones. Yellow adds warmth. White lightens. Pink adds life to a flat shade. Blue cools an overly yellow shade. Used together with the included mixing guide, they allow you to create a shade that does not approximate your skin tone but actually matches it. Mixing palette and spatula for precise blending before application. Mixing guide and QR code tutorial — step-by-step guidance from someone who actually has vitiligo. The formula contains hyaluronic acid, tocopherol, and skin conditioning oils ingredients that support skin health rather than simply sitting on top of it.
How to Apply Camouflage Makeup for Vitiligo — The Full Method Preparation: Begin with clean, fully moisturised skin. Vitiligo patches are often drier than surrounding skin applying coverage to dry skin creates patchy application and reduces longevity. Apply lightweight moisturiser, allow to absorb for at least five minutes. If going outdoors, apply SPF depigmented patches have no natural UV protection. Colour Matching: Place a small amount of your closest base shade on the palette. Add adjusters one at a time in tiny amounts. Check the mix against your skin in natural daylight not artificial light. Adjust until the mixed shade becomes genuinely difficult to see against your surrounding skin. Application: Apply to the vitiligo patch using a clean fingertip and a firm patting motion. Pat, not rub, patting presses pigment into the skin rather than dragging it across. Blending: Blend edges of the covered area into surrounding skin with a very light touch. No visible line of demarcation. This is the step that makes coverage look like skin rather than makeup. Building: For deeper contrast, allow first layer to set briefly then apply a second thin layer. Two thin layers always look more natural than one thick one.
Setting: Apply loose translucent setting powder with a puff in a pressing motion. Non-negotiable — without setting powder, coverage transfers within an hour regardless of formula quality. With it, coverage lasts a full day.
How Long Does Coverage Last? Properly applied and set, the Kandor Camouflage Method Set provides all-day coverage through normal daily activity — typically eight to twelve hours. It is water resistant rather than waterproof. For touch-ups during the day, carry a small amount of your pre mixed shade. A light reapplication followed by a press of powder takes under two minutes. Vitiligo on the Face vs the Body Facial vitiligo requires a more refined application, thin layers, careful edge blending, and thorough setting. The face is observed closely and expressions create skin movement that stresses coverage. A lighter handed approach produces better results. Body vitiligo allows heavier application. Setting is particularly important on body areas experiencing contact and friction. For very large areas, multiple kit applications may be needed.
The Emotional Reality:Research published by the British Skin Foundation found that skin conditions have a significant psychological impact, with many sufferers experiencing anxiety, depression, and social withdrawal. The Vitiligo Society UK reports that the emotional impact of vitiligo is consistently underestimated by medical professionals. Camouflage makeup is a tool — one that gives people back choices on their own terms. The ability to choose coverage on some days and go bare on others, to feel comfortable in situations that previously caused anxiety, to stop thinking about your skin every time you leave the house. These are meaningful outcomes that deserve better products than the market has historically provided.
The Kandor Camouflage Method Set was built by someone who understands this from the inside. That is not a marketing position. It is the reason the product exists.
CLICK HERE TO GET YOURS?!
Frequently Asked Questions -
Can you completely cover vitiligo with makeup?
Yes, with the right product and technique. A specialist high pigmentation camouflage formula with a precise colour mixing system can cover vitiligo patches to a degree that is undetectable in normal social situations. Standard foundation cannot achieve this. What is the best makeup for vitiligo on dark skin?
The Kandor Camouflage Method Set includes a Deep base shade and orange and blue adjusters specifically to address the undertone correction needed for darker skin tone vitiligo coverage — an area most camouflage products fail at most significantly. Does vitiligo makeup look natural? Applied correctly, thin layers, careful edge blending, thorough setting, specialist camouflage makeup can look completely natural in person and in photography. Is camouflage makeup safe for sensitive vitiligo skin? The Kandor formula contains hyaluronic acid and vitamin E and is free from alcohol and harsh fragrances. Patch testing before full application is recommended for anyone with significant sensitivities.
How do I match my skin tone for vitiligo coverage?
Always check your colour match in natural daylight. Start with the closest base shade and adjust gradually. The mixing guide included with the kit walks through this step by step. Can I wear vitiligo camouflage makeup every day? Yes. The formula is designed for daily wear and contains skin-supportive ingredients compatible with everyday use. Proper removal each evening with a gentle cleanser maintains skin health. What's the difference between skin camouflage and regular concealer? Skin camouflage is a specialist product category formulated specifically for covering significant pigmentation differences. The primary difference is pigment density — camouflage products contain significantly more pigment per unit volume
Sources from - vitiligosociety.org, britishskinfoundation.org.uk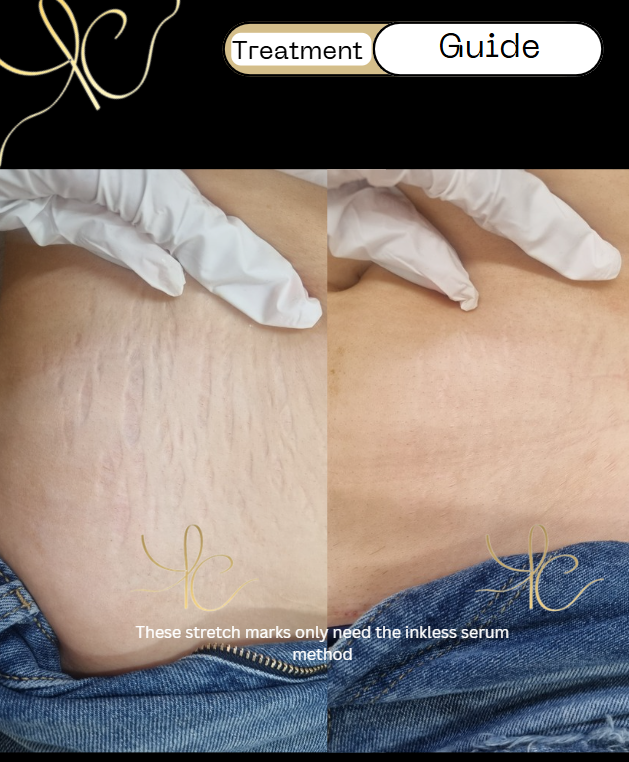
Professional grade sterile peptide serum ampoules for MCA medical needling, microneedling and inkless skin camouflage. Designed to stimulate rapid collagen regeneration.
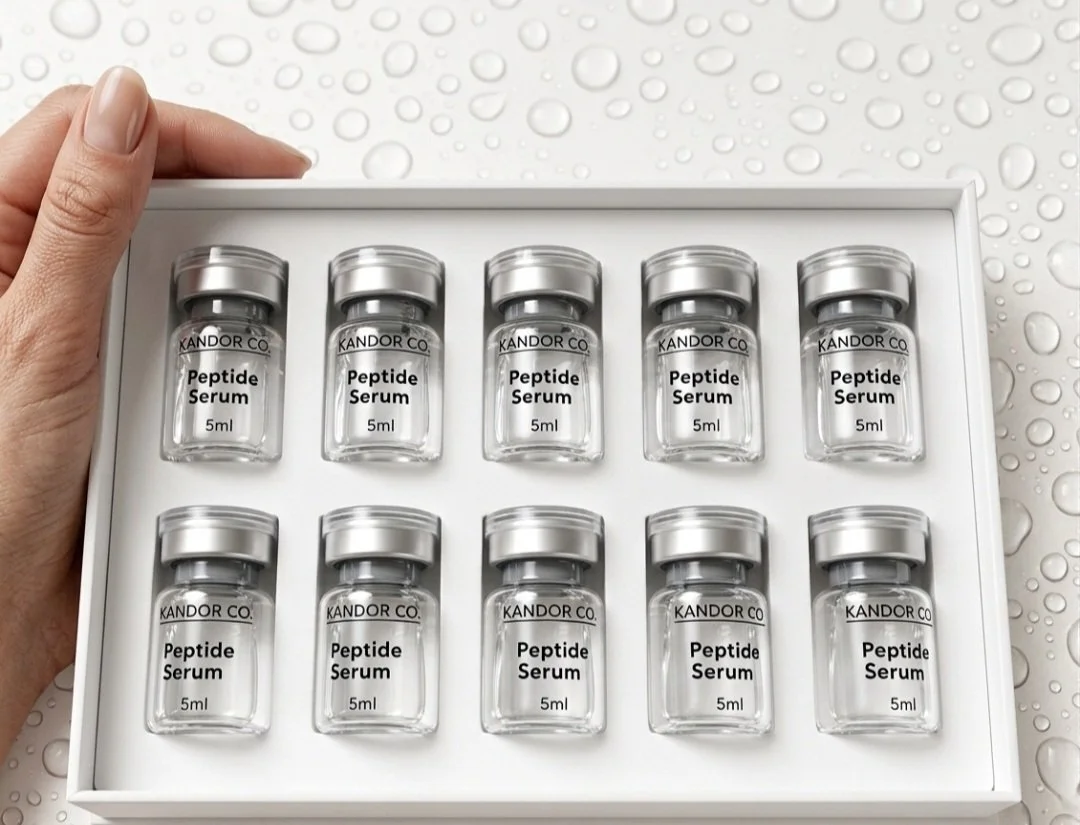
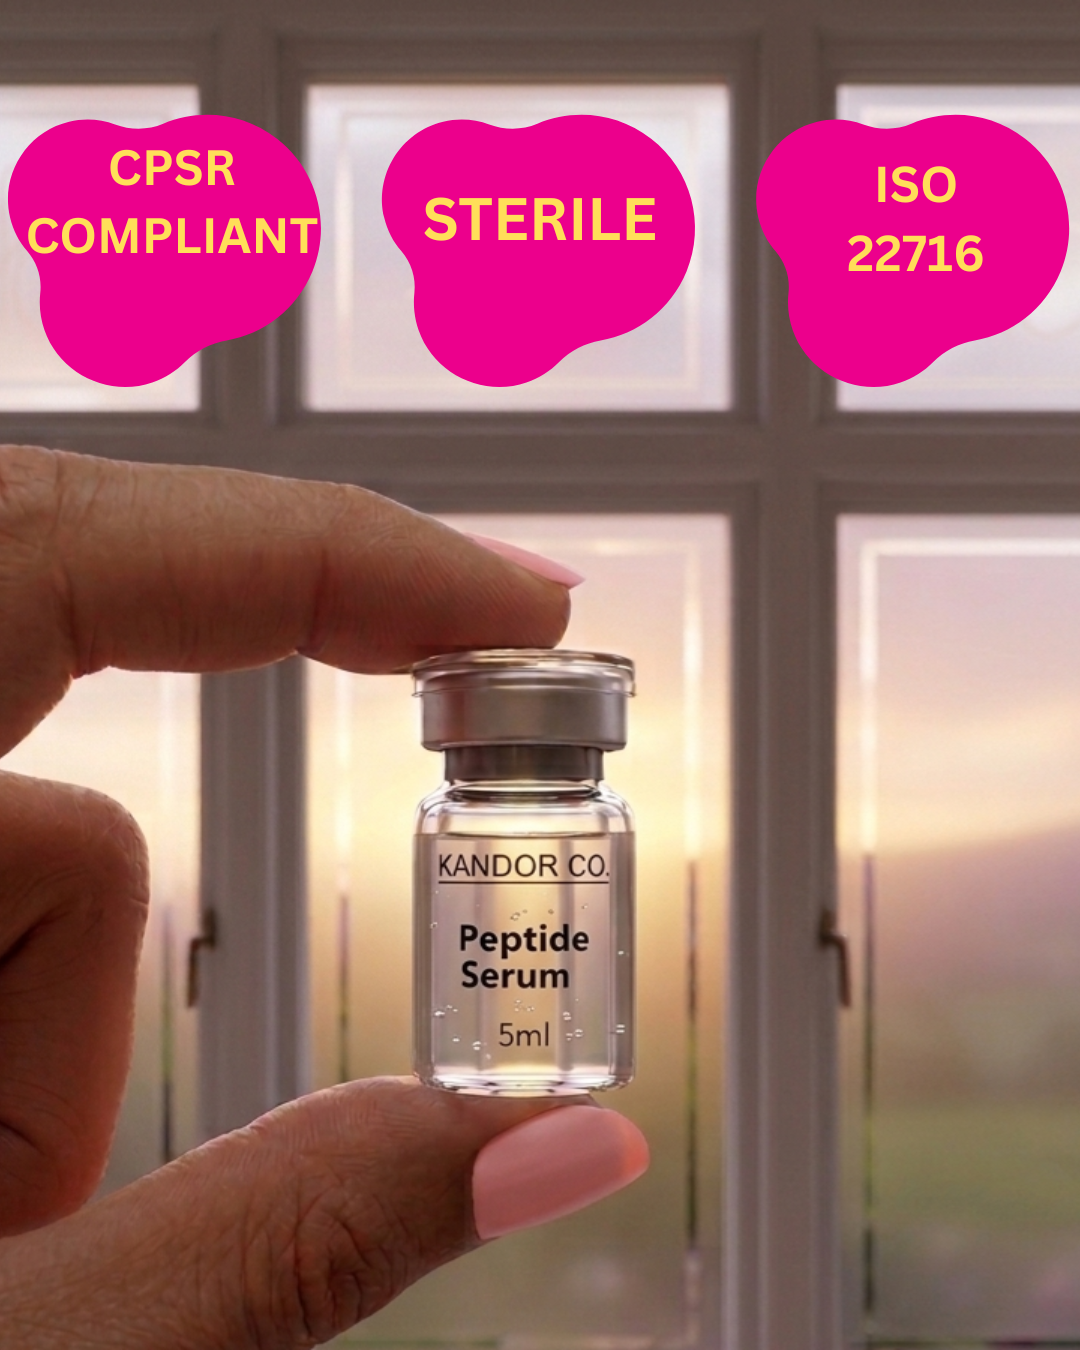
The High Performance Quad Peptide MCA Matrix - Free Shipping | Clearpay & KLARNA
Looking where to buy serum for inkless stretch mark camouflage, serum for scar camouflage medical needling, or even paramedical tattoo dermal remodelling?. For years, advanced PMU artists, paramedical tattoo practitioners, and medical clinics globally have searched for a definitive solution to reverse deep striae, silver stretch marks, and stubborn surgical scars. While early market innovations laid the foundation for Multi Trepannic Collagen Actuation (MCA) and dry tattooing, the industry has shifted. Superficial skin boosters are no longer enough because modern clients demand flawless, rapid textural restoration and authentic, pigment free dermal regeneration.
The Kandor Co. Scar and Stretchmark Peptide Serum Ampoule Set is the answer. Specifically engineered for seamless micro channeling infusion, this formula completely bypasses outdated cosmetic trends to deliver an intense, bio engineered cellular command directly to the dermal epidermal junction. It does not just hydrate the skin surface because it systematically reprograms damaged tissue to rebuild itself from the inside out.
Why More Ingredients Mean Massive Risk
It is common to find over complicated formulations designed to impress on a label rather than perform safely in the skin. Well known first generation products heavily market a massive chaotic cocktail, deeply infusing an overstuffed, non calibrated mesotherapy recipe into open micro channels.
Advanced aesthetics training networks have reported a sharp rise in urgent enquiries from students whose clients are experiencing unexpected allergic reactions, post procedural contact dermatitis and prolonged erythema. When an MCA needle bar breaks the protective epidermal barrier, the underlying tissue becomes hyper vulnerable to foreign bodies. Flooding these fresh dermal pathways with volatile co enzymes and uncalibrated acids completely overloads the skin's immune response, triggering a defensive, allergic flare up instead of a controlled healing cascade. Kandor Co. eliminates this chemical noise entirely. By replacing a chaotic ingredient list with a hyper focused, biocompatible formulation, we can deliver unrivalled structural results.
Targeted Cellular Signalling Over Simple Surface Hydration
True tissue reconstruction requires intelligent direction, not just superficial hydration. Many standard academies and global camouflage brands rely heavily on basic, single dimension hyaluronic acid options like generic hyaluron serums or basic boosters to lubricate the skin during a treatment. While these basic formulas provide short term plumping, they utterly fail to initiate the deep cellular communication required to remodel severe structural defects.
Kandor Co. leaves basic hydration lines and standard alternatives far behind by deploying an elite, high dose network of four bio available signalling peptides paired with a powerhouse wrinkle relaxing hexapeptide. Our targeted formulation behaves like a biological architect. The precise introduction of Hexapeptide works instantaneously at the treatment site to relax the rigid, anchored micro tensions that hold old, fibrous scar matrices in place, allowing deep, wrinkly, or crinkled stretch marks to flatten out and smooth effortlessly.
Simultaneously, our exclusive Peptide Quad Matrix signals the body's fibroblasts to rapidly synthesise dense, perfectly organised Type I and Type III collagen. This eliminates the cellular confusion that causes adverse skin reactions, smoothly guiding the body to naturally repigment and re densify thin, hollow or silver tissue.
Box Contents:
The airtight, medical grade seals protect the high potency peptide chain from light degradation and atmospheric oxidation, ensuring maximum biological activity for every single session. There are no cheap plastic dropper bottles or leaky caps.
Unlike thicker, oily serums or inconsistent formulas that can gum up your machinery, our water based fluid features an optimised, low viscosity molecular weight. This guarantees smooth, uniform, and effortless delivery through rotary tattoo machines, PMU devices, and digital microneedling cartridges without ever clogging your needle modules or causing messy splattering.
A little goes a long way and you can comfortably use 1 vial per client, making the earning potential considerably more. A safe, stable and highly effective formula across all skin tones on the Fitzpatrick scale. It provides the ultimate glide, keeping the treatment area perfectly conditioned, reducing post trauma inflammation, and accelerates the client's healing timeline.
Every box contains 10 sterile, 5ml peptide ampoules engineered specifically for professional MCA medical needling, inkless camouflage, and advanced microneedling. The formulation is completely biocompatible, hypoallergenic, non comedogenic, and safe for all Fitzpatrick skin types.
Distributed globally with rapid worldwide shipping options available immediately. This topical solution is designed strictly for application during controlled micro channeling protocols and must never be injected.
Formulated under the strictest regulatory oversight. Our serum is fully UK CPSR certified (Cosmetic Product Safety Report) and manufactured exclusively in a verified ISO 22716 and GMP compliant facility.
Free international shipping on orders over £200. Free UK & Ireland shipping on orders over £99.
Why Top Practitioners Choose Kandor Co Over Legacy Serums
Sterile Single Use Vials 5ml x 10 prevents cross contamination and is specifically designed with exact pour and syringe extraction compatibility for clinical grade hygiene
Triple Peptide Signaling Complex is powered by Acetyl Hexapeptide 8 Tripeptides and Tetrapeptides to mechanically trigger natural collagen synthesis and elastin layout
Low and High Molecular Weight Hyaluronate creates a high slip non drying barrier during needling while simultaneously driving moisture deep into the micro trauma channels
Intended for Professional Use and free from heavy oils artificial fragrances or fillers that jeopardize skin integrity during open skin treatments
Unlock next generation dermal reconstruction with the Kandor Co Scar and Stretchmark Peptide Serum Ampoule Set Specially engineered for advanced aesthetics professionals this high potency sterile serum is the ultimate fluid medium for MCA Medical Needling Microneedling Dermapen and Inkless Scar Camouflage
Unlike legacy multi vitamin serums that merely condition the skin surface our advanced formulation utilizes biomimetic peptides to communicate directly with skin cells accelerating cellular turnover resetting damaged tissue memory and forcing deep dermal repair where deep scars and striae live.
Do not settle for basic hydration! Our pharmaceutical grade deck targets repair at a cellular level.
Acetyl Hexapeptide 8 helps relax cellular tension around rigid scar walls smoothing out uneven textural damage.
Tripeptides and Tetrapeptides act as cellular messengers that shout at fibroblasts to synthesize new healthy Type I and Type III collagen.
Arginine and Sodium Lactate are essential structural building blocks that maintain optimal skin pH and repair the moisture barrier post procedure.
Treatment Compatibility
Inkless Stretch Mark Camouflage MCA Dry Needling
Collagen Induction Therapy CIT Microneedling
Post Laser Resurfacing Regeneration
Fibroblast Plasma Aftercare Support
The Science of Dermal Repair Why Peptides Eclipse Vitamins in Inkless Stretch Mark Camouflage
If you run a professional aesthetics clinic you know that Inkless Stretch Mark Camouflage and MCA Multichannel Aesthetic Medical Needling are transforming how we treat severe skin abnormalities.
For years artists relied on basic vitamin cocktails and multi nutrient blends to fuel the micro trauma healing process, but as search trends for the best serum for microneedling scars and inkless scar camouflage serum hit all time highs clients and practitioners are demanding faster more permanent results.
To truly fix deep scar tissue and torn elastic matrices stretch marks skin needs more than just nourishment It needs an architectural reset.
Here is why advanced Peptides are completely replacing traditional vitamin serums in elite clinical settings
Many legacy serums on the market boast an exhaustive checklist of dozens of vitamins amino acids and co enzymes - on paper it sounds impressive, but in practice traditional vitamins are highly volatile.
When you perform MCA dry needling or deep microneedling you are inducing a controlled skin injury. Your target is not just to feed the skin it is to stimulate the rapid production of Type I and Type III collagen
To understand why modern formulations outperform older vitamin based options look at how they interact with open skin.
Collagen stimulation in vitamin blends relies entirely on the bodys natural unassisted trauma response whereas peptide formulations mechanically accelerate fibroblast activation maximizing the healing window
Textural smoothing speed is traditionally slow with vitamin serums typically requiring 4 to 6 weeks for visible structural changes while hexapeptides work rapidly by relaxing the rigid micro tensions within deep scar walls.
If you want to achieve a 30 percent to 80 percent reduction in scar and stretch mark depth within fewer sessions your fluid medium must contain three essential components';
Scar tissue is inherently tight fibrous and restricted Acetyl Hexapeptide 8 helps modulate micro tensions within the skins surface softening the edges of atrophic scars and allowing new tissue to layout smoothly without pitting.
These peptides trick the body into believing that a massive systemic breakdown of collagen has occurred In response your fibroblasts go into overdrive spinning out thick layers of pristine collagen and elastin directly inside the stretch mark channel.
A premium serum must provide a frictionless glide for the machine needle cartridge Sodium Hyaluronate ensures smooth hand speed mechanics while simultaneously binding moisture directly into the newly created micro channels.
How to Integrate Kandor Co Peptides into Your Clinic
To shift your client results from temporary hydration to permanent skin rejuvenation modify your protocol as follows
1 Extraction Disinfect the vial stopper using 70 percent alcohol Use a sterile single use syringe to extract exactly 2 to 3ml of the Kandor Co Peptide Serum
2 Application Apply a few drops directly to the targeted stretch mark or scar segment to establish a high slip baseline
3 Execution Proceed with your MCA or microneedling technique the micro needles will drive the peptide molecules directly into the dermal layer
4 Post Treatment rub any remaining extracted serum onto the treated zone. Do not inject, dismiss the single use vial contents immediately after the session to maintain total clinical sterility
Clinical FAQ Maximizing Scar and Stretch Mark Results
What is the best serum for microneedling scars and stretch marks?
The best serum for microneedling deep scars contain biomimetic signaling peptides such as Tripeptides and Tetrapeptides paired with a high slip Sodium Hyaluronate base While traditional vitamin serums provide basic hydration structural peptides actively signal the skin cells to rebuild lost collagen.
Does microneedling help stretch marks permanently?
Yes, microneedling and MCA medical needling physically disrupt old damaged scar tissue. When combined with a dedicated stretch mark rejuvenation serum the body replaces the torn dermal fibers with healthy permanent collagen layers drastically fading the appearance of the marks.
Does inkless scar camouflage work on all skin types?
Inkless scar camouflage works exceptionally well on all skin tones because it does not rely on pigment matching Instead of covering the flaw with ink it uses a specialized sterile serum to force melanin production and structural repair eliminating the risk of the camouflage changing colour over time.
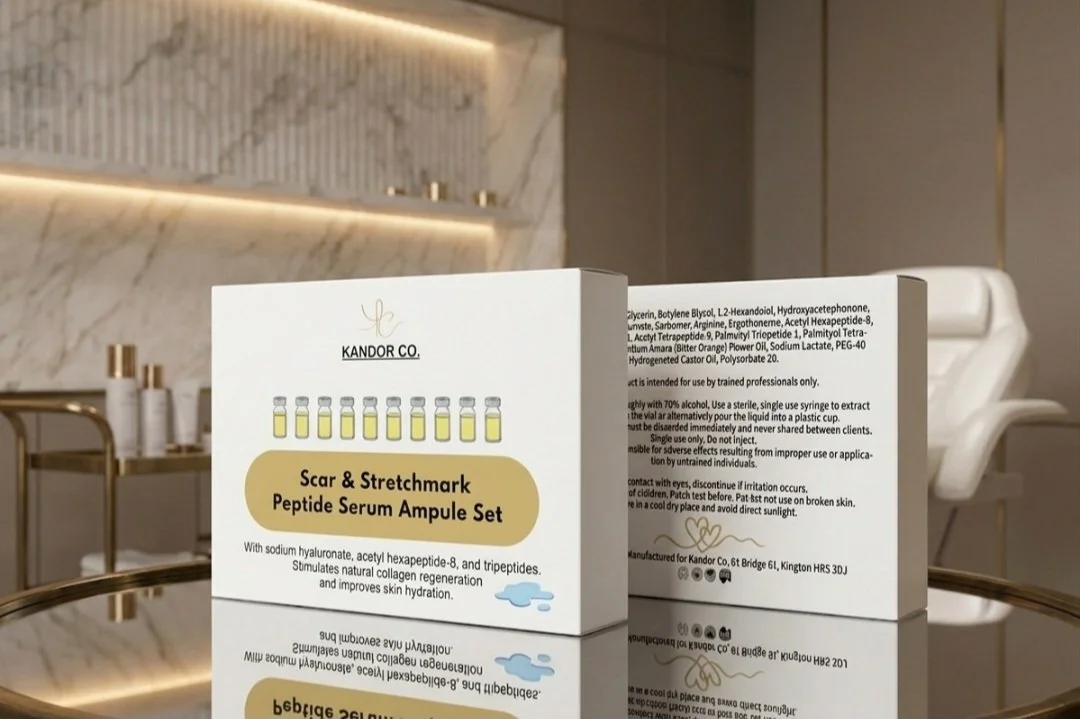

My Skin, My Story: How Vitiligo Makeup Changed My Confidence and Inspired the Kandor Camouflage Method
A real story of living with vitiligo, acne, and confidence struggles — and how it led to creating the Kandor Camouflage Method Set, the best makeup for vitiligo and white patches.
My Story Begins: When Makeup for Vitiligo Was a Prescription, Not a Choice
When I was 14, vitiligo makeup wasn’t something luxurious — it came from a prescription.
The medical concealers I was given to hide my vitiligo patches were thick, chalky, and painfully obvious. They didn’t blend or breathe; they just masked.
Every day, I’d apply layers of this clinical camouflage makeup over my white patches and acne scars, hoping no one would notice. But instead of feeling confident, I felt like I was hiding behind a wall.
That’s when I started experimenting. Mixing those prescription products with face oils and serums, trying to make a more natural-looking vitiligo concealer.

The Best Makeup for Vitiligo Patches? | How I Created the Kandor Camouflage Method
A real story of living with vitiligo, acne, and confidence struggles — and how it led to creating the Kandor Camouflage Method Set, the best makeup for vitiligo and white patches.
My Story Begins: When Makeup for Vitiligo Was a Prescription, Not a Choice
When I was 14, vitiligo makeup wasn’t something luxurious — it came from a prescription.
The medical concealers I was given to hide my vitiligo patches were thick, chalky, and painfully obvious. They didn’t blend or breathe; they just masked.
Every day, I’d apply layers of this clinical camouflage makeup over my white patches and acne scars, hoping no one would notice. But instead of feeling confident, I felt like I was hiding behind a wall.
That’s when I started experimenting. Mixing those prescription products with face oils and serums, trying to make a more natural-looking vitiligo concealer.
Eventually, I found a mix that actually worked — a homemade version of vitiligo camouflage makeup that gave me enough confidence to step outside.
But my confidence was fragile. I still couldn’t face the world without my “mask.”
The mirror, the sunlight, even opening the door to the postman — they all felt impossible without full coverage.
How My Journey with Vitiligo Makeup Turned Into a Mission
At 18, I realized something: if I could mix my own vitiligo coverage makeup, maybe I could help others too.
I started studying ingredients, pigment chemistry, and colour theory — understanding how to neutralize tones and blend white vitiligo patches naturally.
I learned what worked for real skin — especially sensitive skin with conditions like vitiligo, rosacea, or acne scarring.
I began formulating my own concealers and camouflage products for vitiligo from scratch. Slowly, people online began reaching out for help — asking for shades, mixtures, and tips for how to cover vitiligo patches on the face or hands.
Seeing people’s confidence return after using something I made was life-changing.
That’s when I fell in love with creating makeup for vitiligo and skin confidence.
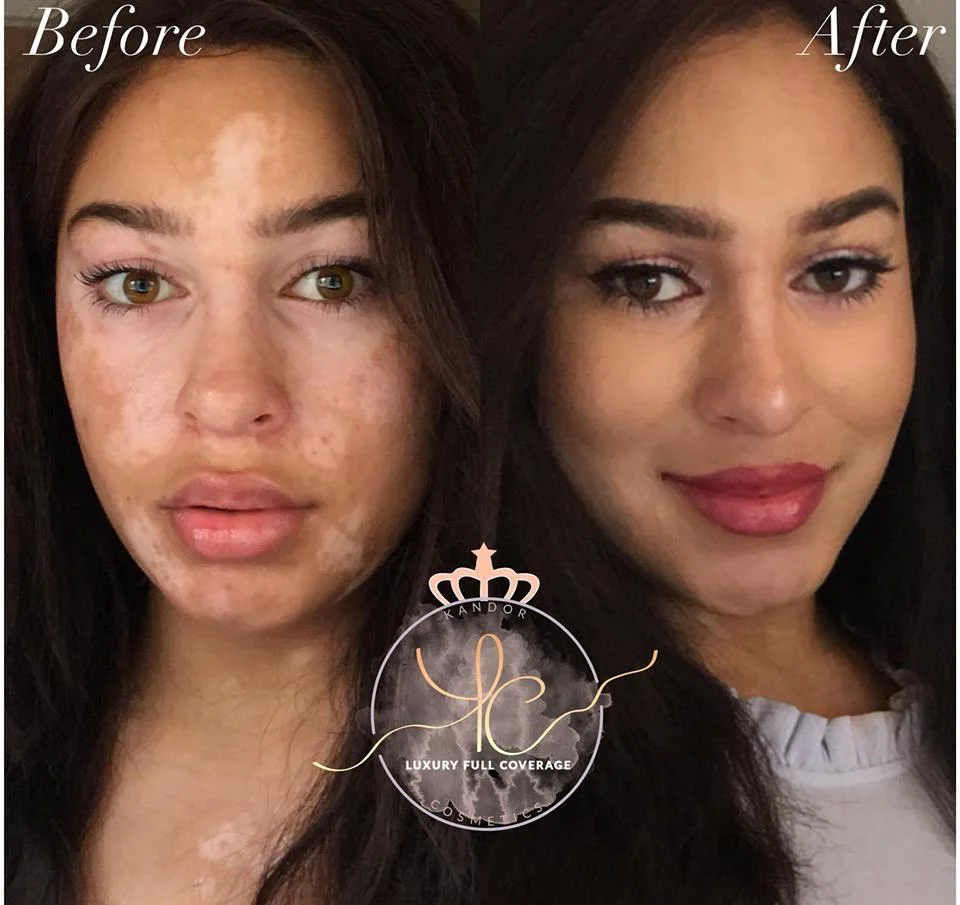

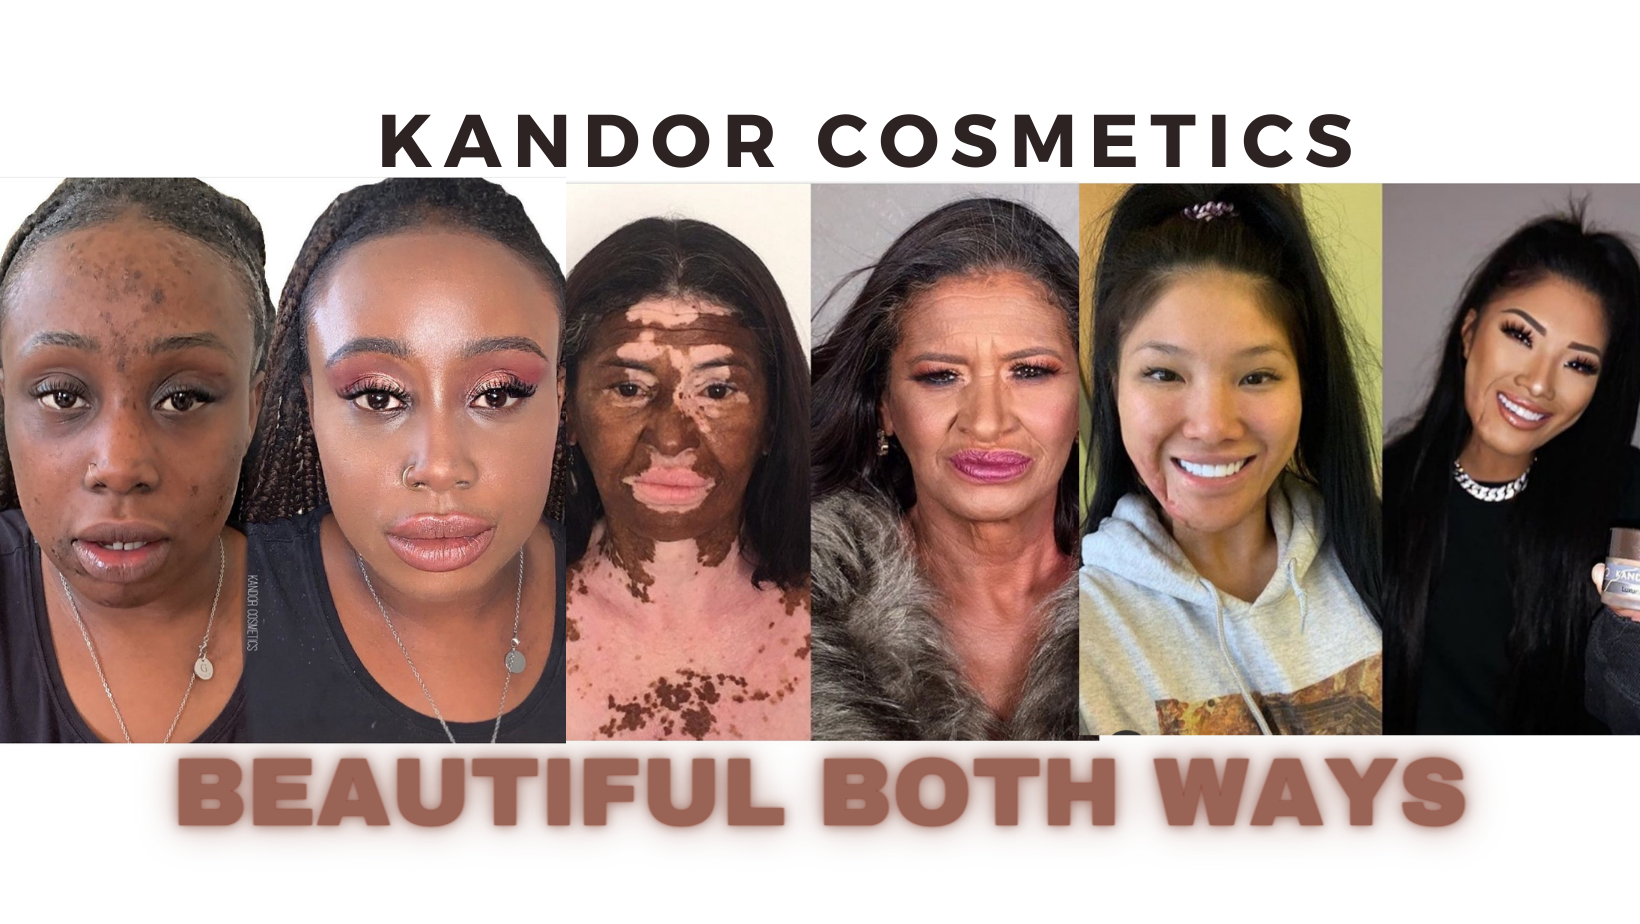
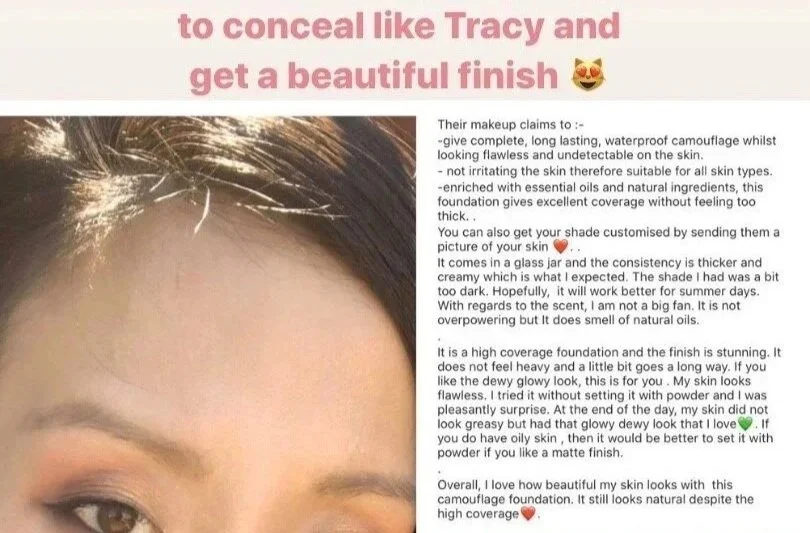

Becoming My Own Test Subject
Even now, I’m still my own client and my own test model.
I use all my formulas daily — including the final version of what would become the Kandor Co. Camouflage Method Set, which many call the best makeup for vitiligo patches today.
I’ve performed skin camouflage treatments, lip neutralisation, laser therapy, and scalp treatments on myself — not because I had to, but because I wanted to truly understand skin.
I test, tweak, and refine every formula on vitiligo, acne-prone areas, and sensitive skin before releasing it.
When people ask how I create such natural results, it’s simple:
Because I live it. Every product is something I’d trust on my own face — no heavy masking, no cakey texture, just breathable natural-finish camouflage makeup for vitiligo.
From Online Blends to Professional Camouflage Expertise
After years of quietly helping people online, sending out small custom batches of vitiligo concealers, I wanted to expand.
I travelled six hours to train in advanced skin camouflage and paramedical pigmentation techniques.
It was intense, but it gave me the skills to combine art, science, and empathy — creating real coverage solutions for people with vitiligo, birthmarks, scarring, or pigmentation issues.
I practiced, perfected, and eventually created my own signature technique — one that’s about enhancing skin, not hiding it.
Now, whether I’m working with clients or teaching other artists, my goal is simple: to help you feel confident in your skin again, no matter what condition you live with.
The Birth of the Kandor Co. Camouflage Method Set — Makeup That Adapts to You
The Kandor Camouflage Method Set was born out of necessity — a system designed specifically as makeup for vitiligo and white patches that actually looks like real skin.
Instead of selling one shade of “vitiligo concealer,” I created a complete camouflage kit that lets you mix your perfect tone, undertone, and depth.
Inside the sleek luxury set, you’ll find:
2 Universal Base Shades – creamy, high-coverage foundations for balance.
6 Professional Adjusters – white, green, yellow, blue, orange, and pink, for full undertone control.
Mixing Palette + Spatula – for creating your personal match.
Mixing Guide + QR Code Tutorial – step-by-step help to blend, mix, and apply.
It’s designed for vitiligo, acne scars, rosacea, birthmarks, and hyperpigmentation, giving long-lasting, natural coverage.
Unlike other vitiligo concealers, this isn’t a one-shade-fits-none product. It’s an adaptive camouflage system that evolves with your skin tone.

These thick, rich and creamy high coverage concealers are made in house with the highest quality ingredients in batch production, with a formula for sensitive and 'difficult' to hide skin types in mind.
The Skin Camouflage Method Set
Your perfect match. Every time.
No more shade-guessing. No more settling. The Kandor Skin Camouflage Set gives you everything you need to create your exact shade — and change it as your skin does.
Inside one sleek kit, you’ll find 2 universal base shades plus 6 pro-level adjusters (white, green, yellow, blue, orange, and pink). Mix, match, and refine until the tone melts seamlessly into your skin.
Birthmarks, vitiligo, scars, hyperpigmentation, rosacea, tattoos — whatever you want to blur, you can do it naturally, beautifully, and without compromise.
Why It Works
One kit, endless matches → Two creamy bases + six shade adjusters give you limitless possibilities.
True camouflage coverage → Designed to cover even the most visible differences, with a radiant, undetectable finish.
No cake, no mask → Dewy, lightweight, breathable. Never the thick “medical” look.
For real skin, by real skin → Created by someone with vitiligo who refused to accept heavy, chalky formulas.
Award-winning → From a triple award-winning brand trusted by skin professionals and everyday users alike.
What’s Inside
2 x Base Shades – your starting point.
6 x Adjusters – White, Green, Yellow, Blue, Orange, Pink.
Alcohol swab
Mixing Palette
Spatula
Mixing Guide + QR Code Tutorial – step-by-step help on blending, application, and pro tips.
With these, you’re never limited to a premade shade. Your skin, your rules.
How to Use
Start with your closest base shade.
Add drops of adjuster to neutralize, brighten, or deepen.
Blend on the back of your hand or palette.
Apply in thin layers, building coverage where you want it.
✨ Pro tip: Scan the QR code in your kit for a video tutorial with insider tips on mixing and application.
Real Coverage. Real Confidence.
Because you shouldn’t have to hide behind makeup — you should shine through it.
Whether you want to:
harmonize vitiligo patches,
soften the look of scars or birthmarks,
balance redness or pigmentation,
or cover a tattoo for the day —
this set adapts to you, not the other way around.
From Our Founder
“I created Kandor because the products I needed didn’t exist. With vitiligo, every formula I tried felt thick, obvious, or clinical. I wanted something beautiful. Something radiant. Something that looked and felt like real skin. This is it.”
What can they do to make your life easier and your skin confidence rocket? We have 4 unique formulas that;
Cover white patches and vitiligo patches
Covers acne scarring and blemishes
Covers scaling redness, blue hues from bruising and dark patches
Helping you live with your skin conditions
Colour match to cover your skin condition and sensitive skin discreetly
Long lasting wear, especially once set with powder.
Mild formula and natural looking glow even if you don’t have a skin condition but want the coverage.
Sadly not vegan because they include a touch of beeswax!
Ingredients:
Caprylic/Capric Triglyceride, Hydrogenated Ethylhexyl Olivate, Hydrogenated Olive Oil Unsaponifiables, Polyglyceryl-4 Oleate, Squalane, Mangifera Indica Seed Butter, Cera Alba, Polyglyceryl-3 Beeswax, Euphorbia Cerifera Cera, Sclerocarya Birrea Seed Oil, Tocopherol, Titanium Dioxide (CI 77891), Iron Oxides (CI 77491, CI 77492, CI 77499), Mica, Boron Nitride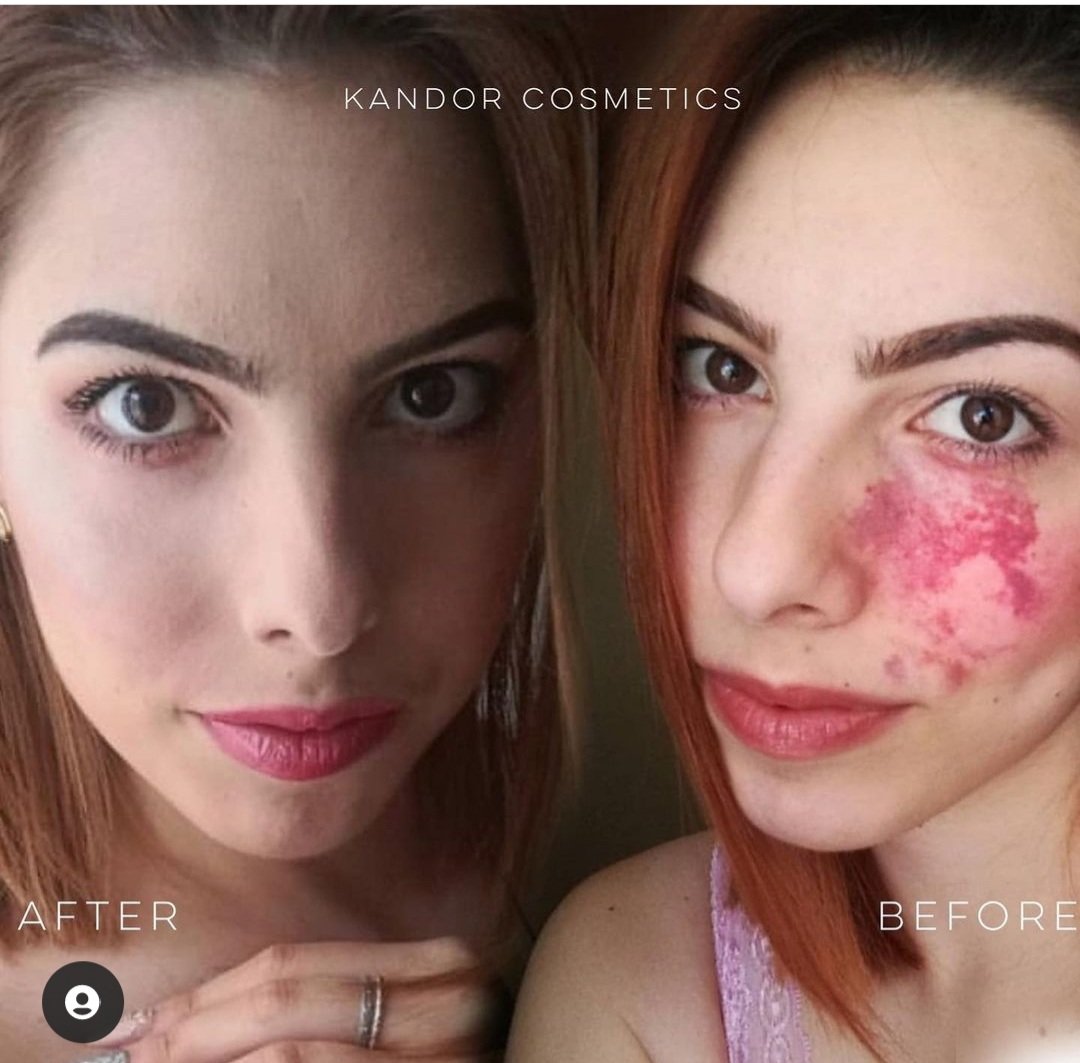
Make it stand out
Whatever it is, the way you tell your story online can make all the difference.
Why It’s Different from Typical Vitiligo Concealers
Most vitiligo concealers and camouflage foundations are static — one premixed shade that oxidizes, cakes, or doesn’t match.
The Kandor Camouflage Method Set offers limitless customization with breathable, skin-loving ingredients.
Thick, creamy, high-coverage base for even large depigmented areas.
Dewy finish that mimics real skin’s glow.
Formulas for sensitive skin, tested on real people with real conditions.
Long-lasting coverage that stays put when set with powder.
Designed to cover vitiligo patches on hands, arms, face, and legs naturally.
This is camouflage makeup redefined — for real skin, by real skin.
I created Kandor for anyone who’s ever felt unseen, judged, or anxious about their appearance.
Whether you’re dealing with vitiligo, acne scars, pigmentation, or redness, you deserve products that empower, not limit.
The Kandor Camouflage Method Set gives you full control — it’s your skin, your rules.
No more shade guessing.
No more flat tones.
Just true-to-you coverage that restores confidence, comfort, and choice.
The Bigger Picture: Skin Positivity and Education
Alongside creating makeup for vitiligo and sensitive skin, I also educate others — teaching camouflage techniques, colour theory, and how to hide vitiligo patches naturally without harming skin health.
Because confidence isn’t just topical — it’s learned.
And when you understand your skin, you stop fighting it and start working with it.
Lessons I’ve Learned (and Want You to Remember)
Makeup for vitiligo is a tool, not a mask.
Camouflage makeup doesn’t hide who you are — it helps reveal your confidence.
There’s no “normal” skin tone; only real skin.
You are allowed to look how you want and still love the skin you’re in.
If You’re Ready to Try
If you’re looking for the best makeup for vitiligo patches — something that offers high coverage but feels like skin — try the Kandor Co. Camouflage Method Set.
It’s more than a concealer. It’s a complete vitiligo camouflage system made by someone who’s lived the journey. Try it here!
🌿 Frequently Asked Questions About Makeup for Vitiligo Patches
- What is the best makeup for vitiligo patches?
The best makeup for vitiligo is highly pigmented, long-wearing, and breathable. My favourite (and the one I created) is the Kandor Co. Camouflage Method Set, which includes adjustable base shades and colour correctors you can mix to perfectly match your own skin tone. It covers white patches naturally — no heavy mask, no chalky residue.
- How can I hide vitiligo patches naturally?
To cover vitiligo patches naturally, start with a clean, moisturised face. Use a camouflage concealer or vitiligo coverage kit that allows custom shade-matching. Apply in thin layers, blending beyond the edges of each patch for a seamless fade. Finish with a light translucent powder for a real-skin finish. Avoid thick, one-tone foundations — they rarely match and can look flat.
- What’s the best concealer for vitiligo on the face and hands?
A high-coverage, mixable concealer works best for both face and hands. Look for formulas designed for camouflage makeup for vitiligo, like the Kandor Co. set. It includes warm, cool, and neutral adjusters to adapt perfectly to facial and hand tones — so your makeup blends evenly across different areas of the body.
- Does camouflage makeup really cover vitiligo?
Yes, professional camouflage makeup can effectively conceal vitiligo patches when applied correctly. The key is strong pigment plus flexibility. Kandor’s creamy base and adjusters create true-to-skin tones that hide depigmentation while still looking luminous and natural.
- Is camouflage makeup safe for sensitive skin?
It depends on the formula — many traditional camouflage products are heavy and irritating. The Kandor Camouflage Method uses mild, skin-friendly ingredients suitable for sensitive or reactive skin. Always patch test first, especially if you have active inflammation or fragile skin.
- How long does vitiligo makeup last during the day?
With correct application and setting powder, vitiligo coverage makeup can last 8–12 hours. The beeswax base in the Kandor formula helps it stay put through heat, humidity, and movement, while remaining comfortable and breathable.
- Can I use makeup for vitiligo on my body too?
Absolutely. Many people use camouflage makeup for vitiligo patches on arms, legs, and neck as well as the face. For larger areas, apply thinly in sections, blend well, and lightly set with powder for natural coverage that moves with your skin.
- How do I choose the right shade for vitiligo coverage?
If you’re using a mix-it-yourself camouflage set, start with your nearest base tone, then use adjusters:
White to lighten
Yellow or orange to warm
Blue or green to cool or neutralise redness Test under natural light to confirm your match. The Kandor Mixing Guide (included in every kit) walks you through each step.
- What is the difference between vitiligo makeup and regular foundation?
Regular foundation evens out mild discoloration. Camouflage makeup for vitiligo is highly pigmented and formulated to match undertones while covering extreme contrast. It’s made to blend, not just tint, and to last longer on areas with less melanin.
- Can makeup make vitiligo worse?
No — vitiligo makeup doesn’t worsen depigmentation. Just be sure to remove it gently with a mild cleanser, moisturise daily, and choose fragrance-free, hypoallergenic formulas like Kandor’s to protect your skin barrier.
- What’s the best way to remove camouflage makeup at night?
Use a soft cleansing balm, micellar oil, or gentle milk cleanser to dissolve pigment, followed by a hydrating moisturiser. Avoid harsh scrubbing — your skin has already done enough work during the day!
- How do I build confidence while living with vitiligo?
Makeup can help, but confidence also comes from understanding your skin and giving yourself grace. Use camouflage makeup for vitiligo patches as a creative tool — not a cover-up. You deserve to feel beautiful whether you wear makeup or not.

Kandor Camouflage Method Set Vitiligo Concealer Review — Real Results, Before & After Review (2025)
How To Hide Vitiligo Patches Naturally
Honest review, before/after photos & tips of the Kandor Camouflage Method Set — see how it hides vitiligo patches, blends undertones, and holds up all day.
Introduction: Why This Review Matters
If you’ve searched for “makeup for vitiligo patches,” “how to hide vitiligo,” or “camouflage concealer review,” you’ve probably seen many formulas that underdeliver. Thick, chalky, masky finishes are all too common.
I’ve tested the Kandor Camouflage Method Set (not just one concealer but a full mixing system) so you don’t have to waste time or money. This review shows real before/after photos, wear tests, pros & cons — and whether it truly delivers in everyday life.
Let’s dive in.
How To Hide Vitiligo Patches Naturally
Honest review, before/after photos & tips of the Kandor Camouflage Method Set — see how it hides vitiligo patches, blends undertones, and holds up all day.
Introduction: Why This Review Matters
If you’ve searched for “makeup for vitiligo patches,” “how to hide vitiligo,” or “camouflage concealer review,” you’ve probably seen many formulas that underdeliver. Thick, chalky, masky finishes are all too common.
I’ve tested the Kandor Camouflage Method Set (not just one concealer but a full mixing system) so you don’t have to waste time or money. This review shows real before/after photos, wear tests, pros & cons — and whether it truly delivers in everyday life.
Let’s dive in.
What Is the Kandor Camouflage Method Set?
(Here is where you reuse your product description — adapted lightly for readability and SEO.)
The Kandor kit contains 2 universal base shades + 6 adjusters (white, green, yellow, blue, orange, pink) so you can mix your exact tone as your skin changes.
It’s designed for sensitive and “difficult to cover” skin, made in-house in small batches with premium ingredients.
The finish is dewy, breathable, and meant to avoid the heavy “medical” look.
Comes with a mixing palette, spatula, mixing guide + QR code tutorial, and an alcohol swab for hygiene.
Use cases: harmonizing vitiligo patches, softening scars or birthmarks, balancing redness/hyperpigmentation, or even concealing a tattoo temporarily.
Four targeted formulas in the range: for vitiligo, for scarring/blemishes, for scaling redness or blue hues, and for sensitive skin.
Note: It contains a touch of beeswax, so it’s not vegan.
This flexibility (mix & match) is the core strength of Kandor — you’re not locked into a single shade.
Scenario 1: Face

Before: noticeable contrast, edges visible.
After applying Kandor (mixed to match surrounding tone), the patch is visually blended. Texture remains natural, not thick or cracked.
Wear Test Results
10 hours wear (with mild activity) — minimal transfer; slight smoothing needed on edges midday.
Sweat / humidity test: held up decently; not perfect in extreme conditions but better than many concealers I’ve tried.
Removal: came off cleanly with micellar oil + gentle cleanser — no tugging, no residue ghosting.
These results suggest it does what it promises when used carefully. It’s not miraculous, but it’s among the strongest camouflage systems I’ve tested.
4. Pros & Cons (What Stood Out)
Pros
Truly customizable — no settling for “closest shade.”
Natural, dewy finish (no chalky mask look).
Versatile: works on face, hands, body.
Good durability for daily wear, once set properly.
Great for sensitive / reactive skin (less irritation).
Strong social proof (users report similar success)
Makeup for vitiligo patches
Helps you learn how to hide vitiligo patches naturally
Could be the best camouflage concealer for vitiligo
Cons / Caveats
Takes a bit of practice to master mixing and blending (not “just swipe and go”).
On highly textured skin or elbows/knees, coverage can thin out.
Because it uses beeswax, not suitable if you're strictly vegan.
Under extreme sweat or water exposure, touchups may be needed.
One kit might take time to learn how to match — early applications may waste product.
5. How It Compares to Other Camouflage / Vitiligo Makeup
Many “vitiligo concealers” are fixed shades with limited adjustment — you’ll often end up off-tone or oxidizing incorrectly.
Zanderm, Veil, Covermark etc are commonly mentioned in this space; their formulas are solid, but they lack the adjuster flexibility Kandor provides.
Generic high-coverage concealers may cover, but often at the cost of heaviness, cracking, or unnatural finish.
In side-by-side tests, Kandor’s ability to fine-tune undertones gave it an edge in realism and blendability.
6. Best Practices / Tips to Get the Most Out of This Set
Always patch test — mix a small amount and let it sit to see how it oxidizes.
Start light: build coverage in thin layers rather than slathering.
Blend edges outward to fade naturally into surrounding skin tone.
Use adjusters carefully — a tiny drop can shift your blend significantly.
Set with a translucent powder or finely milled finishing powder.
Carry a small dot (on a mixing palette or palette card) for midday touch-ups.
For textured areas, gently press pigment in (don’t drag).
Remove gently — no harsh scrubbing.
You can check out the set here!
🌿 Frequently Asked Questions About Makeup for Vitiligo Patches
- What is the best makeup for vitiligo patches?
The best makeup for vitiligo is highly pigmented, long-wearing, and breathable. My favourite (and the one I created) is the Kandor Co. Camouflage Method Set, which includes adjustable base shades and colour correctors you can mix to perfectly match your own skin tone. It covers white patches naturally — no heavy mask, no chalky residue.
- How can I hide vitiligo patches naturally?
To cover vitiligo patches naturally, start with a clean, moisturised face. Use a camouflage concealer or vitiligo coverage kit that allows custom shade-matching. Apply in thin layers, blending beyond the edges of each patch for a seamless fade. Finish with a light translucent powder for a real-skin finish. Avoid thick, one-tone foundations — they rarely match and can look flat.
- What’s the best concealer for vitiligo on the face and hands?
A high-coverage, mixable concealer works best for both face and hands. Look for formulas designed for camouflage makeup for vitiligo, like the Kandor Co. set. It includes warm, cool, and neutral adjusters to adapt perfectly to facial and hand tones — so your makeup blends evenly across different areas of the body.
- Does camouflage makeup really cover vitiligo?
Yes, professional camouflage makeup can effectively conceal vitiligo patches when applied correctly. The key is strong pigment plus flexibility. Kandor’s creamy base and adjusters create true-to-skin tones that hide depigmentation while still looking luminous and natural.
- Is camouflage makeup safe for sensitive skin?
It depends on the formula — many traditional camouflage products are heavy and irritating. The Kandor Camouflage Method uses mild, skin-friendly ingredients suitable for sensitive or reactive skin. Always patch test first, especially if you have active inflammation or fragile skin.
- How long does vitiligo makeup last during the day?
With correct application and setting powder, vitiligo coverage makeup can last 8–12 hours. The beeswax base in the Kandor formula helps it stay put through heat, humidity, and movement, while remaining comfortable and breathable.
- Can I use makeup for vitiligo on my body too?
Absolutely. Many people use camouflage makeup for vitiligo patches on arms, legs, and neck as well as the face. For larger areas, apply thinly in sections, blend well, and lightly set with powder for natural coverage that moves with your skin.
- How do I choose the right shade for vitiligo coverage?
If you’re using a mix-it-yourself camouflage set, start with your nearest base tone, then use adjusters:
White to lighten
Yellow or orange to warm
Blue or green to cool or neutralise redness Test under natural light to confirm your match. The Kandor Mixing Guide (included in every kit) walks you through each step.
- What is the difference between vitiligo makeup and regular foundation?
Regular foundation evens out mild discoloration. Camouflage makeup for vitiligo is highly pigmented and formulated to match undertones while covering extreme contrast. It’s made to blend, not just tint, and to last longer on areas with less melanin.
- Can makeup make vitiligo worse?
No — vitiligo makeup doesn’t worsen depigmentation. Just be sure to remove it gently with a mild cleanser, moisturise daily, and choose fragrance-free, hypoallergenic formulas like Kandor’s to protect your skin barrier.
- What’s the best way to remove camouflage makeup at night?
Use a soft cleansing balm, micellar oil, or gentle milk cleanser to dissolve pigment, followed by a hydrating moisturiser. Avoid harsh scrubbing — your skin has already done enough work during the day!
- How do I build confidence while living with vitiligo?
Makeup can help, but confidence also comes from understanding your skin and giving yourself grace. Use camouflage makeup for vitiligo patches as a creative tool — not a cover-up. You deserve to feel beautiful whether you wear makeup or not.

The Ultimate Guide to Camouflage Makeup for Vitiligo (2025 Edition)
Makeup for vitiligo used to mean compromise — thick, chalky, heavy textures that looked more like plaster than skin.
But in 2025, the landscape is different. New formulations and bespoke colour systems mean you can now blur, balance, and beautify without hiding your skin’s essence.
Enter Kandor Co.’s Camouflage Method Set — a breakthrough system built by someone with vitiligo, for real skin that changes tone, texture, and story.

Why This Camouflage Makeup for Vitiligo Has Changed Everything
Makeup for vitiligo used to mean compromise — thick, chalky, heavy textures that looked more like plaster than skin.
But in 2025, the landscape is different. New formulations and bespoke colour systems mean you can now blur, balance and beautify without hiding your skin’s essence.
Enter Kandor Co.’s Camouflage Method Set — a breakthrough system built by someone with vitiligo, for real skin that changes tone, texture, and story.
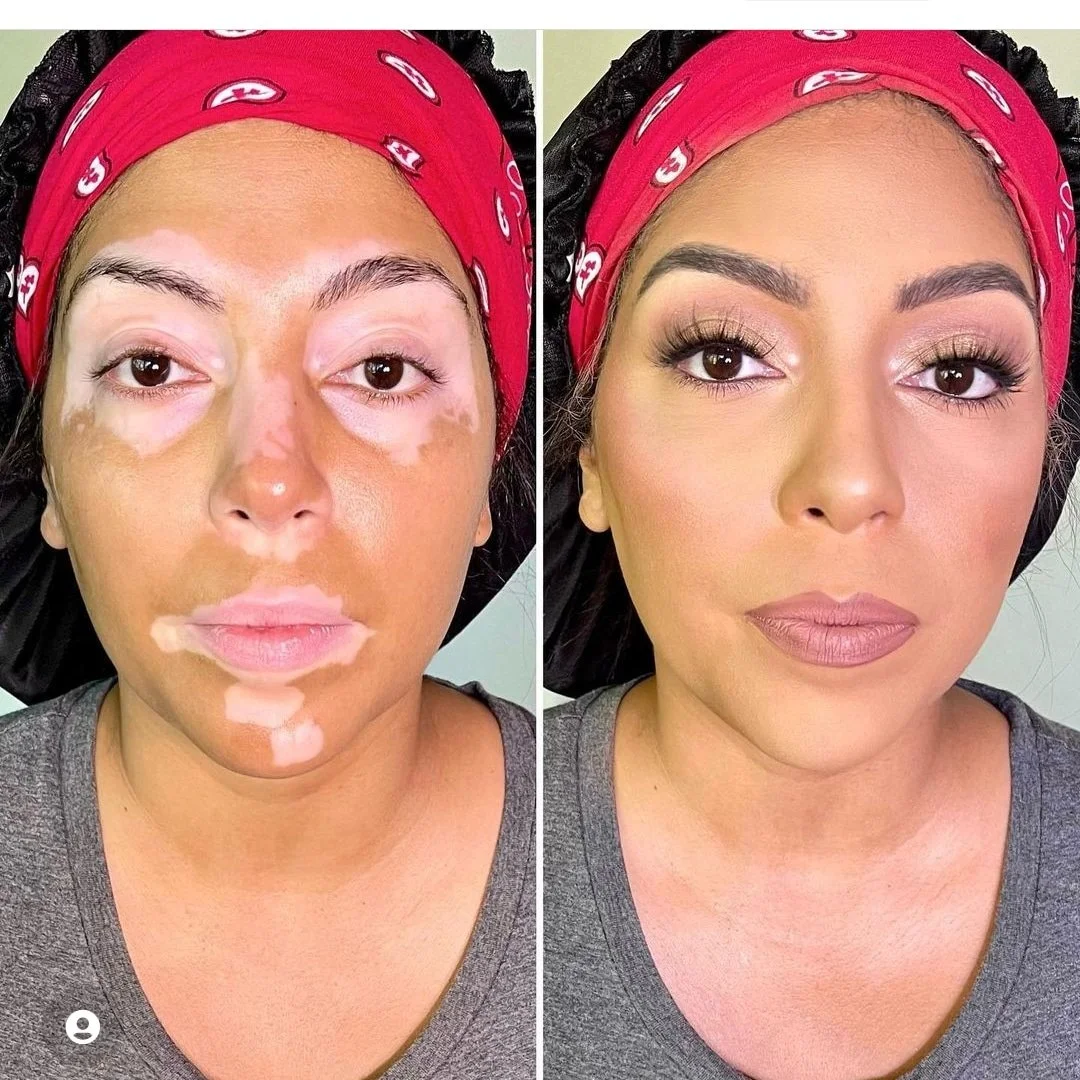
What Is Camouflage Makeup?
Camouflage makeup — sometimes called “medical makeup” is a high coverage, pigment rich formulation designed to blend areas of depigmentation, hyperpigmentation, or scarring seamlessly into surrounding skin.
Unlike everyday foundation, camouflage formulas are engineered to:
Deliver dense pigment payoff in thin layers.
Remain flexible and breathable on the skin.
Resist oxidation and colour shift over time.
Provide a natural, undetectable finish that mimics real skin’s luminosity.
When created thoughtfully, it’s not about masking it’s about harmonizing.
The Kandor Co. Camouflage Method Set: Real Coverage, Real Confidence
Luxury editorial meets laboratory precision.
The Kandor Camouflage Method Set isn’t a single concealer, it’s a full professional-grade system giving you endless control over tone, undertone, and finish.
“Your perfect match. Every time.”
What’s inside:
2 Universal Base Shades — your customisable starting points.
6 Pro Adjusters — white, green, yellow, blue, orange, and pink for colour correction and nuance.
Mixing Palette & Spatula — blend, refine, and create your match in seconds.
Mixing Guide + QR Tutorial — pro tips and video support built right into the experience.
Alcohol Swab — for pristine hygiene before mixing.
Each batch is made in house, using the highest quality ingredients and tailored formulas designed for sensitive or “difficult to cover” skin types.
This is skin camouflage reimagined as artistry and care combined.
Why It Works (and Why Professionals Are Paying Attention)
One kit, endless matches
Two base shades + six adjusters = infinite possibilities. No more shade guessing, no more settling.True camouflage coverage
Conceals even the most visible differences from vitiligo and birthmarks to tattoos with a radiant, skin like finish.No cake, no mask
The texture is creamy yet breathable, offering the coverage of a concealer with the softness of real skin.For real skin, by real skin
Created by someone with vitiligo who refused to accept clinical, heavy formulas.Award-winning innovation
Developed by a triple award winning brand trusted by professionals and real users alike.
The Secret to Seamless Vitiligo Coverage: Mixing Your Perfect Match
Here’s where Kandor outshines generic concealers — it empowers you to become your own shade expert.
Start with your closest base shade.
Add a touch of the adjusters to neutralize undertones:
White for lightening
Yellow to warm
Blue to cool
Green to balance redness
Orange / Pink to brighten or correct dullness
Blend on your palette or the back of your hand.
Apply in thin, even layers over vitiligo patches or any area you wish to balance.
Set lightly with powder for day long hold.
✨ Pro tip: Scan the QR code included in every set for an exclusive step by step tutorial and insider tricks for achieving pro level camouflage.
What Makes Kandor Different from Other Vitiligo Makeup Brands
While some brands offer single shade concealers, Kandor’s system eliminates shade limitations entirely.
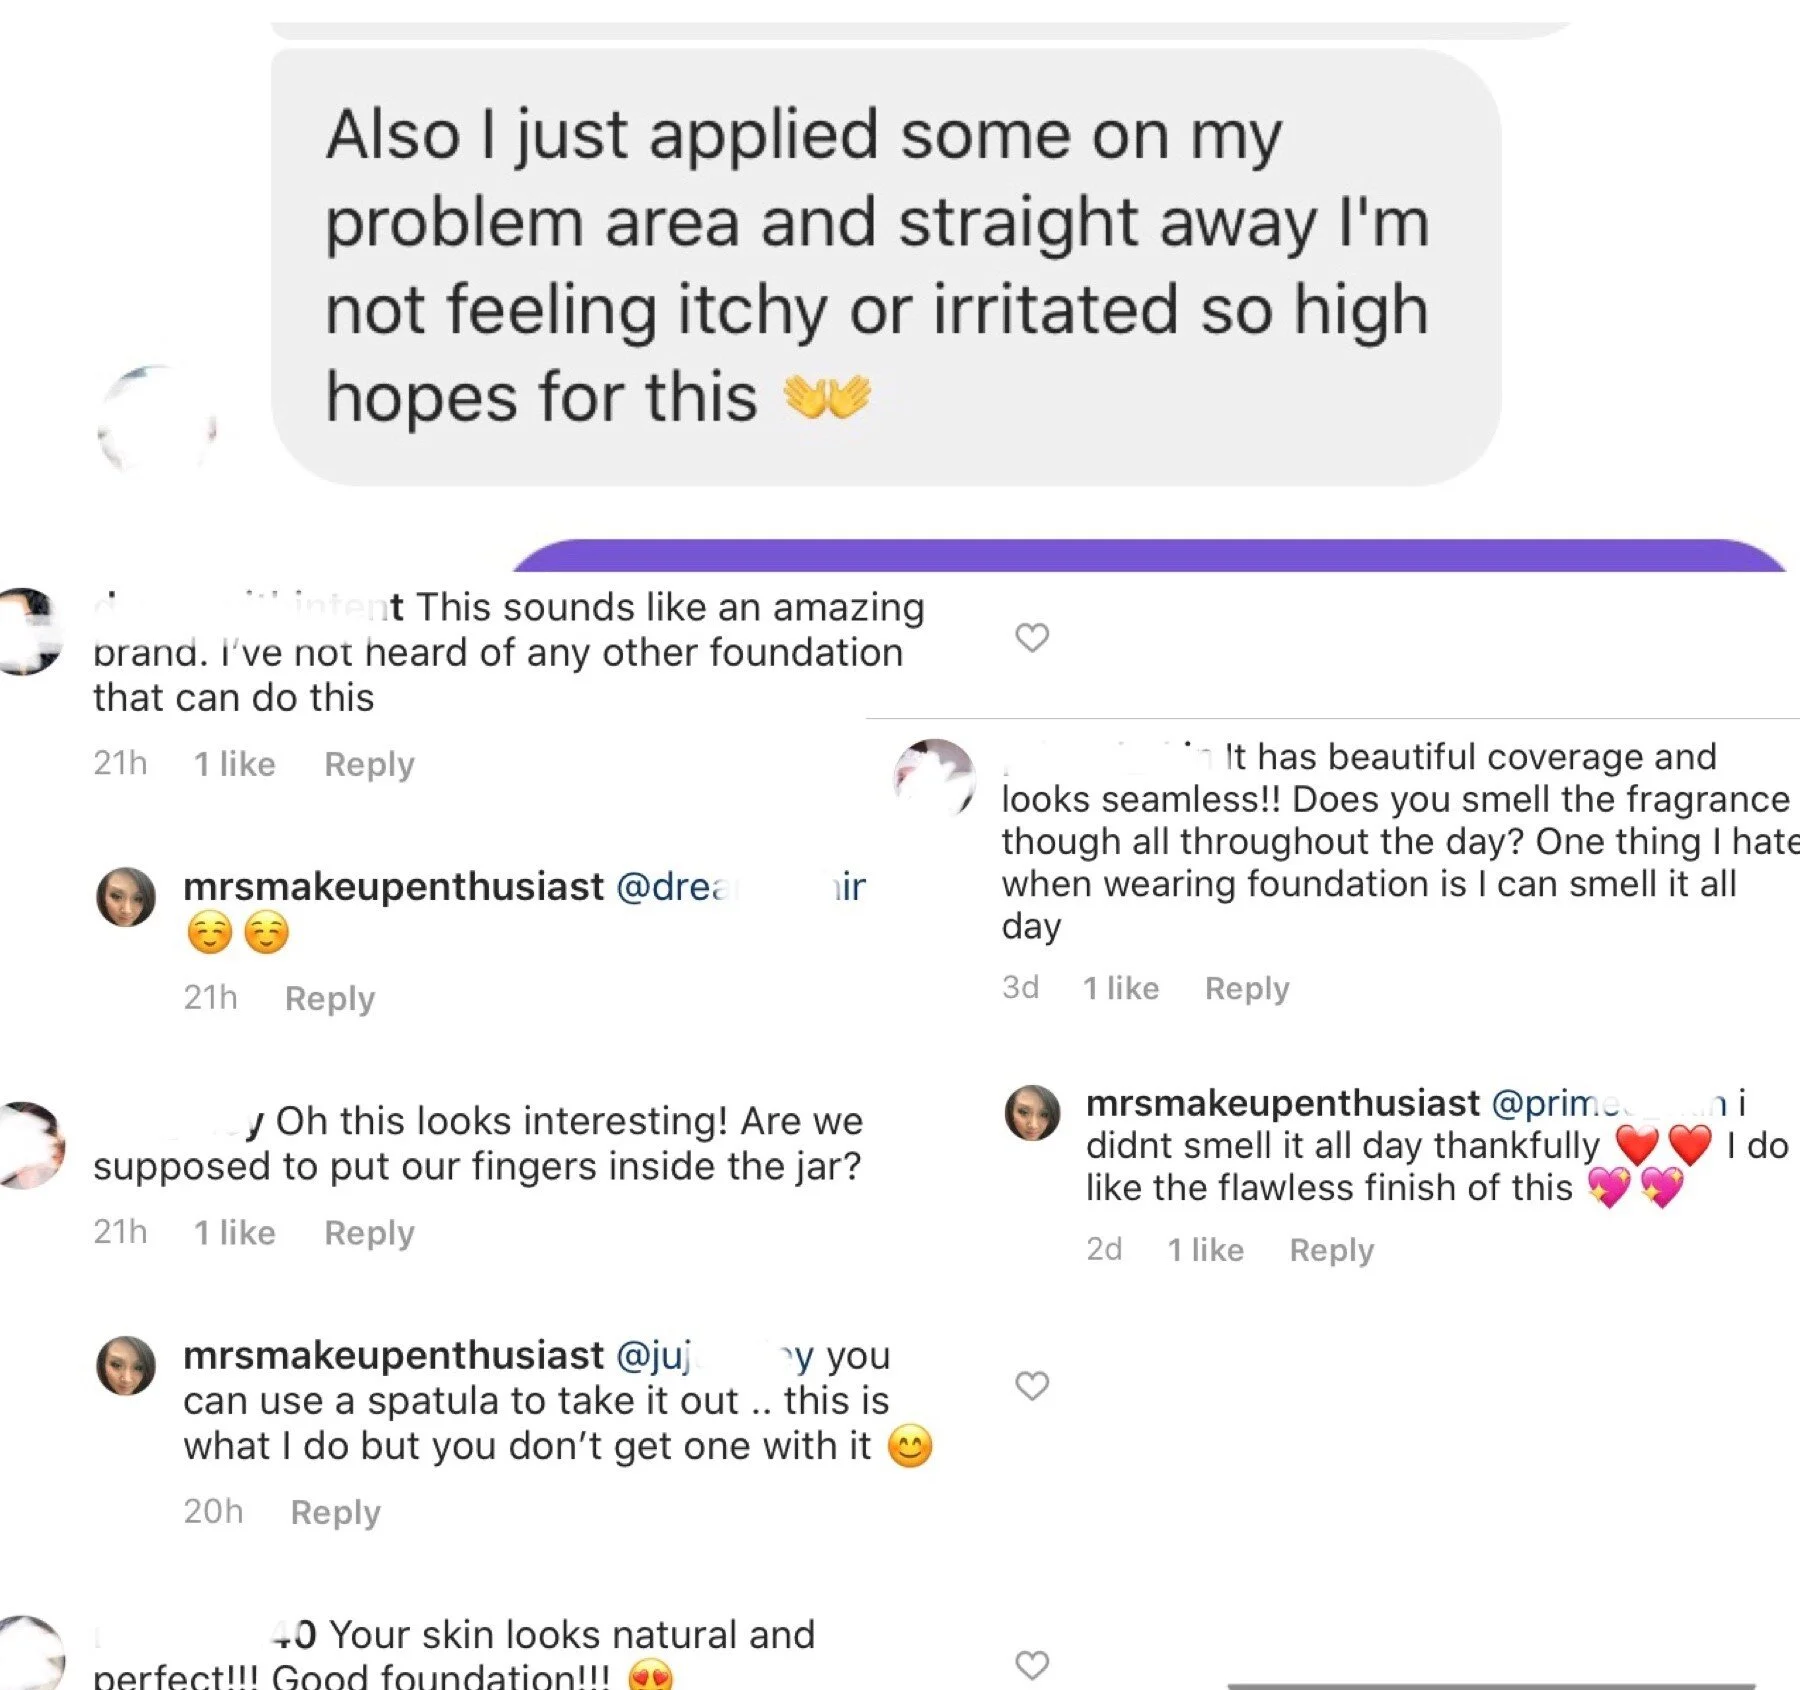
These thick, rich and creamy high coverage concealers are made in house with the highest quality ingredients in batch production, with a formula for sensitive and 'difficult' to hide skin types in mind.
The Skin Camouflage Method Set
Your perfect match. Every time.
No more shade-guessing. No more settling. The Kandor Skin Camouflage Set gives you everything you need to create your exact shade — and change it as your skin does.
Inside one sleek kit, you’ll find 2 universal base shades plus 6 pro-level adjusters (white, green, yellow, blue, orange, and pink). Mix, match, and refine until the tone melts seamlessly into your skin.
Birthmarks, vitiligo, scars, hyperpigmentation, rosacea, tattoos — whatever you want to blur, you can do it naturally, beautifully, and without compromise.
Why It Works
One kit, endless matches → Two creamy bases + six shade adjusters give you limitless possibilities.
True camouflage coverage → Designed to cover even the most visible differences, with a radiant, undetectable finish.
No cake, no mask → Dewy, lightweight, breathable. Never the thick “medical” look.
For real skin, by real skin → Created by someone with vitiligo who refused to accept heavy, chalky formulas.
Award-winning → From a triple award-winning brand trusted by skin professionals and everyday users alike.
What’s Inside
2 x Base Shades – your starting point.
6 x Adjusters – White, Green, Yellow, Blue, Orange, Pink.
Alcohol swab
Mixing Palette
Spatula
Mixing Guide + QR Code Tutorial – step-by-step help on blending, application, and pro tips.
With these, you’re never limited to a premade shade. Your skin, your rules.
How to Use
Start with your closest base shade.
Add drops of adjuster to neutralize, brighten, or deepen.
Blend on the back of your hand or palette.
Apply in thin layers, building coverage where you want it.
✨ Pro tip: Scan the QR code in your kit for a video tutorial with insider tips on mixing and application.
Real Coverage. Real Confidence.
Because you shouldn’t have to hide behind makeup — you should shine through it.
Whether you want to:
harmonize vitiligo patches,
soften the look of scars or birthmarks,
balance redness or pigmentation,
or cover a tattoo for the day —
this set adapts to you, not the other way around.
From Our Founder
“I created Kandor because the products I needed didn’t exist. With vitiligo, every formula I tried felt thick, obvious, or clinical. I wanted something beautiful. Something radiant. Something that looked and felt like real skin. This is it.”
What can they do to make your life easier and your skin confidence rocket? We have 4 unique formulas that;
Cover white patches and vitiligo patches
Covers acne scarring and blemishes
Covers scaling redness, blue hues from bruising and dark patches
Helping you live with your skin conditions
Colour match to cover your skin condition and sensitive skin discreetly
Long lasting wear, especially once set with powder.
Mild formula and natural looking glow even if you don’t have a skin condition but want the coverage.
Sadly not vegan because they include a touch of beeswax!
Ingredients:
Caprylic/Capric Triglyceride, Hydrogenated Ethylhexyl Olivate, Hydrogenated Olive Oil Unsaponifiables, Polyglyceryl-4 Oleate, Squalane, Mangifera Indica Seed Butter, Cera Alba, Polyglyceryl-3 Beeswax, Euphorbia Cerifera Cera, Sclerocarya Birrea Seed Oil, Tocopherol, Titanium Dioxide (CI 77891), Iron Oxides (CI 77491, CI 77492, CI 77499), Mica, Boron NitrideReal Coverage, Real Confidence
Whether you want to:
Harmonize vitiligo patches,
Soften scars or birthmarks,
Balance redness or pigmentation, or
Conceal a tattoo for the day —
the Kandor Camouflage Method Set adapts to you, not the other way around.
“Because you shouldn’t have to hide behind makeup — you should shine through it.”
From Our Founder
“I created Kandor because the products I needed didn’t exist.
With vitiligo, every formula I tried felt thick, obvious, or clinical.
I wanted something beautiful. Something radiant. Something that looked and felt like real skin.
This is it.”
That authenticity is at the heart of why Kandor resonates. It’s not just another beauty brand; it’s a skin confidence movement.
How It Helps You Live Freely with Your Skin
The Kandor system has a tailored formula for different needs:
Vitiligo & white patches – balanced, natural coverage that melts in.
Acne scarring & blemishes – smooth diffusion without dryness.
Scaling redness / blue bruising hues – colour correction that looks believable.
Everyday sensitive skin – mild, long-wear formula for a natural glow.
The blend includes a touch of beeswax for longevity and creaminess — not vegan, but essential for that skin-hugging texture professionals love.
Once set with powder, it lasts through humidity, movement, and long days without cracking or sliding.
Skin Prep & Aftercare for Camouflage Makeup
Cleanse gently and pat dry.
Moisturize — hydrated skin helps pigment spread evenly.
Prime (optional) if you’re covering larger areas.
Remove with a mild cleanser or micellar oil at night — no tugging or scrubbing.
Caring for your skin underneath keeps your camouflage looking better and feeling healthier long term.
FAQ: People Also Ask
Is the Kandor Camouflage Method Set suitable for sensitive skin?
Yes — it’s formulated with mild, skin-loving ingredients and tested by users with vitiligo and reactive skin types.
Does it look natural in daylight?
Absolutely. The finish is radiant and undetectable — no chalkiness or mask effect.
Can I use it on my hands and body?
Yes! Many use it on arms, legs, and neck to balance tone across visible areas.
How long does one set last?
Because each application uses minimal product, one kit lasts months even with daily use.
Why This Set Is Redefining “Vitiligo Makeup”
The Kandor Co. Camouflage Method Set isn’t about perfection — it’s about power, artistry, and freedom.
It replaces frustration with experimentation, and self consciousness with creativity.
It’s not “cover and hide.”
It’s blend and reveal.
And that philosophy is what’s putting Kandor Co. at the forefront of the vitiligo beauty conversation in 2025.
Final Word
If you’ve ever felt makeup wasn’t made for you, Kandor Co. proves it finally can be.
Hand-crafted. Thoughtful. Luxurious. Inclusive.
A true skin solution designed by someone who understands the journey.
The Kandor Camouflage Method Set — real coverage, real confidence, your skin, your rules.
You can buy it here!
🌿 Frequently Asked Questions About Makeup for Vitiligo Patches
- What is the best makeup for vitiligo patches?
The best makeup for vitiligo is highly pigmented, long wearing, and breathable. My favourite (and the one I created) is the Kandor Co. Camouflage Method Set, which includes adjustable base shades and colour correctors you can mix to perfectly match your own skin tone. It covers white patches naturally — no heavy mask, no chalky residue.
- How can I hide vitiligo patches naturally?
To cover vitiligo patches naturally, start with a clean, moisturised face. Use a camouflage concealer or vitiligo coverage kit that allows custom shade matching. Apply in thin layers, blending beyond the edges of each patch for a seamless fade. Finish with a light translucent powder for a real-skin finish. Avoid thick, one-tone foundations — they rarely match and can look flat.
- What’s the best concealer for vitiligo on the face and hands?
A high coverage, mixable concealer works best for both face and hands. Look for formulas designed for camouflage makeup for vitiligo, like the Kandor Co. set. It includes warm, cool, and neutral adjusters to adapt perfectly to facial and hand tones — so your makeup blends evenly across different areas of the body.
- Does camouflage makeup really cover vitiligo?
Yes, professional camouflage makeup can effectively conceal vitiligo patches when applied correctly. The key is strong pigment plus flexibility. Kandor’s creamy base and adjusters create true-to-skin tones that hide depigmentation while still looking luminous and natural.
- Is camouflage makeup safe for sensitive skin?
It depends on the formula — many traditional camouflage products are heavy and irritating. The Kandor Camouflage Method uses mild, skin friendly ingredients suitable for sensitive or reactive skin. Always patch test first, especially if you have active inflammation or fragile skin.
- How long does vitiligo makeup last during the day?
With correct application and setting powder, vitiligo coverage makeup can last 8–12 hours. The beeswax base in the Kandor formula helps it stay put through heat, humidity, and movement, while remaining comfortable and breathable.
- Can I use makeup for vitiligo on my body too?
Absolutely. Many people use camouflage makeup for vitiligo patches on arms, legs, and neck as well as the face. For larger areas, apply thinly in sections, blend well, and lightly set with powder for natural coverage that moves with your skin.
- How do I choose the right shade for vitiligo coverage?
If you’re using a mix-it-yourself camouflage set, start with your nearest base tone, then use adjusters:
White to lighten
Yellow or orange to warm
Blue or green to cool or neutralise redness Test under natural light to confirm your match. The Kandor Mixing Guide (included in every kit) walks you through each step.
- What is the difference between vitiligo makeup and regular foundation?
Regular foundation evens out mild discoloration. Camouflage makeup for vitiligo is highly pigmented and formulated to match undertones while covering extreme contrast. It’s made to blend, not just tint, and to last longer on areas with less melanin.
- Can makeup make vitiligo worse?
No — vitiligo makeup doesn’t worsen depigmentation. Just be sure to remove it gently with a mild cleanser, moisturise daily, and choose fragrance-free, hypoallergenic formulas like Kandor’s to protect your skin barrier.
- What’s the best way to remove camouflage makeup at night?
Use a soft cleansing balm, micellar oil, or gentle milk cleanser to dissolve pigment, followed by a hydrating moisturiser. Avoid harsh scrubbing — your skin has already done enough work during the day!
- How do I build confidence while living with vitiligo?
Makeup can help, but confidence also comes from understanding your skin and giving yourself grace. Use camouflage makeup for vitiligo patches as a creative tool — not a cover-up. You deserve to feel beautiful whether you wear makeup or not.

What Happens After Your First Session Of Laser Tattoo Removal?
Tattoos are a great way to express yourself, but sometimes you might want to remove them and start afresh. Laser tattoo removal is a very effective method, but it's essential to know what to expect after your first session.
Immediate Post-Treatment Reactions
Redness and Swelling After your laser tattoo removal procedure, you will notice redness and swelling in the treated area. This is a normal reaction and indicates that the laser is working. These symptoms usually subside within a couple of days.
Mild Blistering and Itching You may experience mild blistering and itching, which are also common but we strive to avoid this by being as gentle as possible when it comes to energy output. Your skin will be very sensitive and tender initially, and these reactions should fade within one to two weeks.
You’ve had your first laser tattoo removal session, what’s next?

Tattoos are a great way to express yourself, but sometimes you might want to remove them and start afresh. Laser tattoo removal is a very effective method, but it's essential to know what to expect after your first session.
Immediate Post-Treatment Reactions
Redness and Swelling After your laser tattoo removal procedure, you will notice redness and swelling in the treated area. This is a normal reaction and indicates that the laser is working. These symptoms usually subside within a couple of days.
Mild Blistering and Itching You may experience mild blistering and itching, which are also common but we strive to avoid this by being as gentle as possible when it comes to energy output. Your skin will be very sensitive and tender initially, and these reactions should fade within one to two weeks.
Raised Areas and Frosting Immediately following laser removal, the tattooed skin may appear “frosted” or powdery. This effect is caused by the skin releasing carbon dioxide and is perfectly natural. It can last up to an hour, sometimes this goes away as quickly as it appeared, and also the more sessions in you are - the less chance of frosting happening at all!
First Week of Healing
Continued Redness and Puffiness The affected area could remain red, puffy, and a slightly itchy for the next week or so. Many clients feel fine after the procedure, and it generally doesn't interfere with day-to-day activities.
Changes in Skin Appearance After the first day, the look of the treated area will continue to change as your body adjusts to the laser treatment. This is a common part of the healing process. If you have any concerns, discuss them with your laser technician.
Ink Breakdown During the first week, your body will continue to break down and digest the ink. The skin will begin to heal, and it's normal for it to remain red and swollen for several days. This process will repeat with each laser session until the tattoo is fully removed. You may even begin to see signs of it fading after the first week!
Tattoo Removal Aftercare Bonus Tips
Boost Your Immune System A strong immune system helps your skin recover faster. It aids in wound healing and infection resistance. You can support your immune system by:
Staying Hydrated Drinking plenty of water is crucial for a healthy immune system. Proper hydration helps remove toxins from the body and regenerates blood cells, speeding up the healing process.
Reducing Alcohol Intake Excessive alcohol consumption can dehydrate you and slow down healing. Try to minimize or avoid alcohol to improve your recovery.
Limiting Smoking Smoking forces your immune system to work harder, which slows down skin healing. Patients who quit smoking have better outcomes and require fewer sessions.
Exercising Regularly Exercise increases blood flow, which helps break down ink molecules in your skin. However, take several days off from intense workouts after your treatment to allow your skin to heal properly.

Kandor Co: The Kitchen Counter Beauty Lab | Join The Waitlist For Live DIY Beauty Formulas & Tutorials!
Unlock the secrets of high end, high performing DIY beauty with The Kitchen Counter Beauty Lab! Dive into the world of homemade beauty products by joining our waitlist today. Be the first to experience our live cosmetic workshops and thrilling challenges. With your email address, you'll gain exclusive access to behind the scenes content and exciting freebies.
Don't miss out on the opportunity to contribute to what products you create. Sign up now to secure your spot. Limited launch spaces are available, so act fast! Join the waitlist for live DIY beauty formulas, tutorials, and a chance to be part of something exciting. Your new hobby awaits.
Join Us! |
Your New Favourite Hobby |
Join Us! | Your New Favourite Hobby |

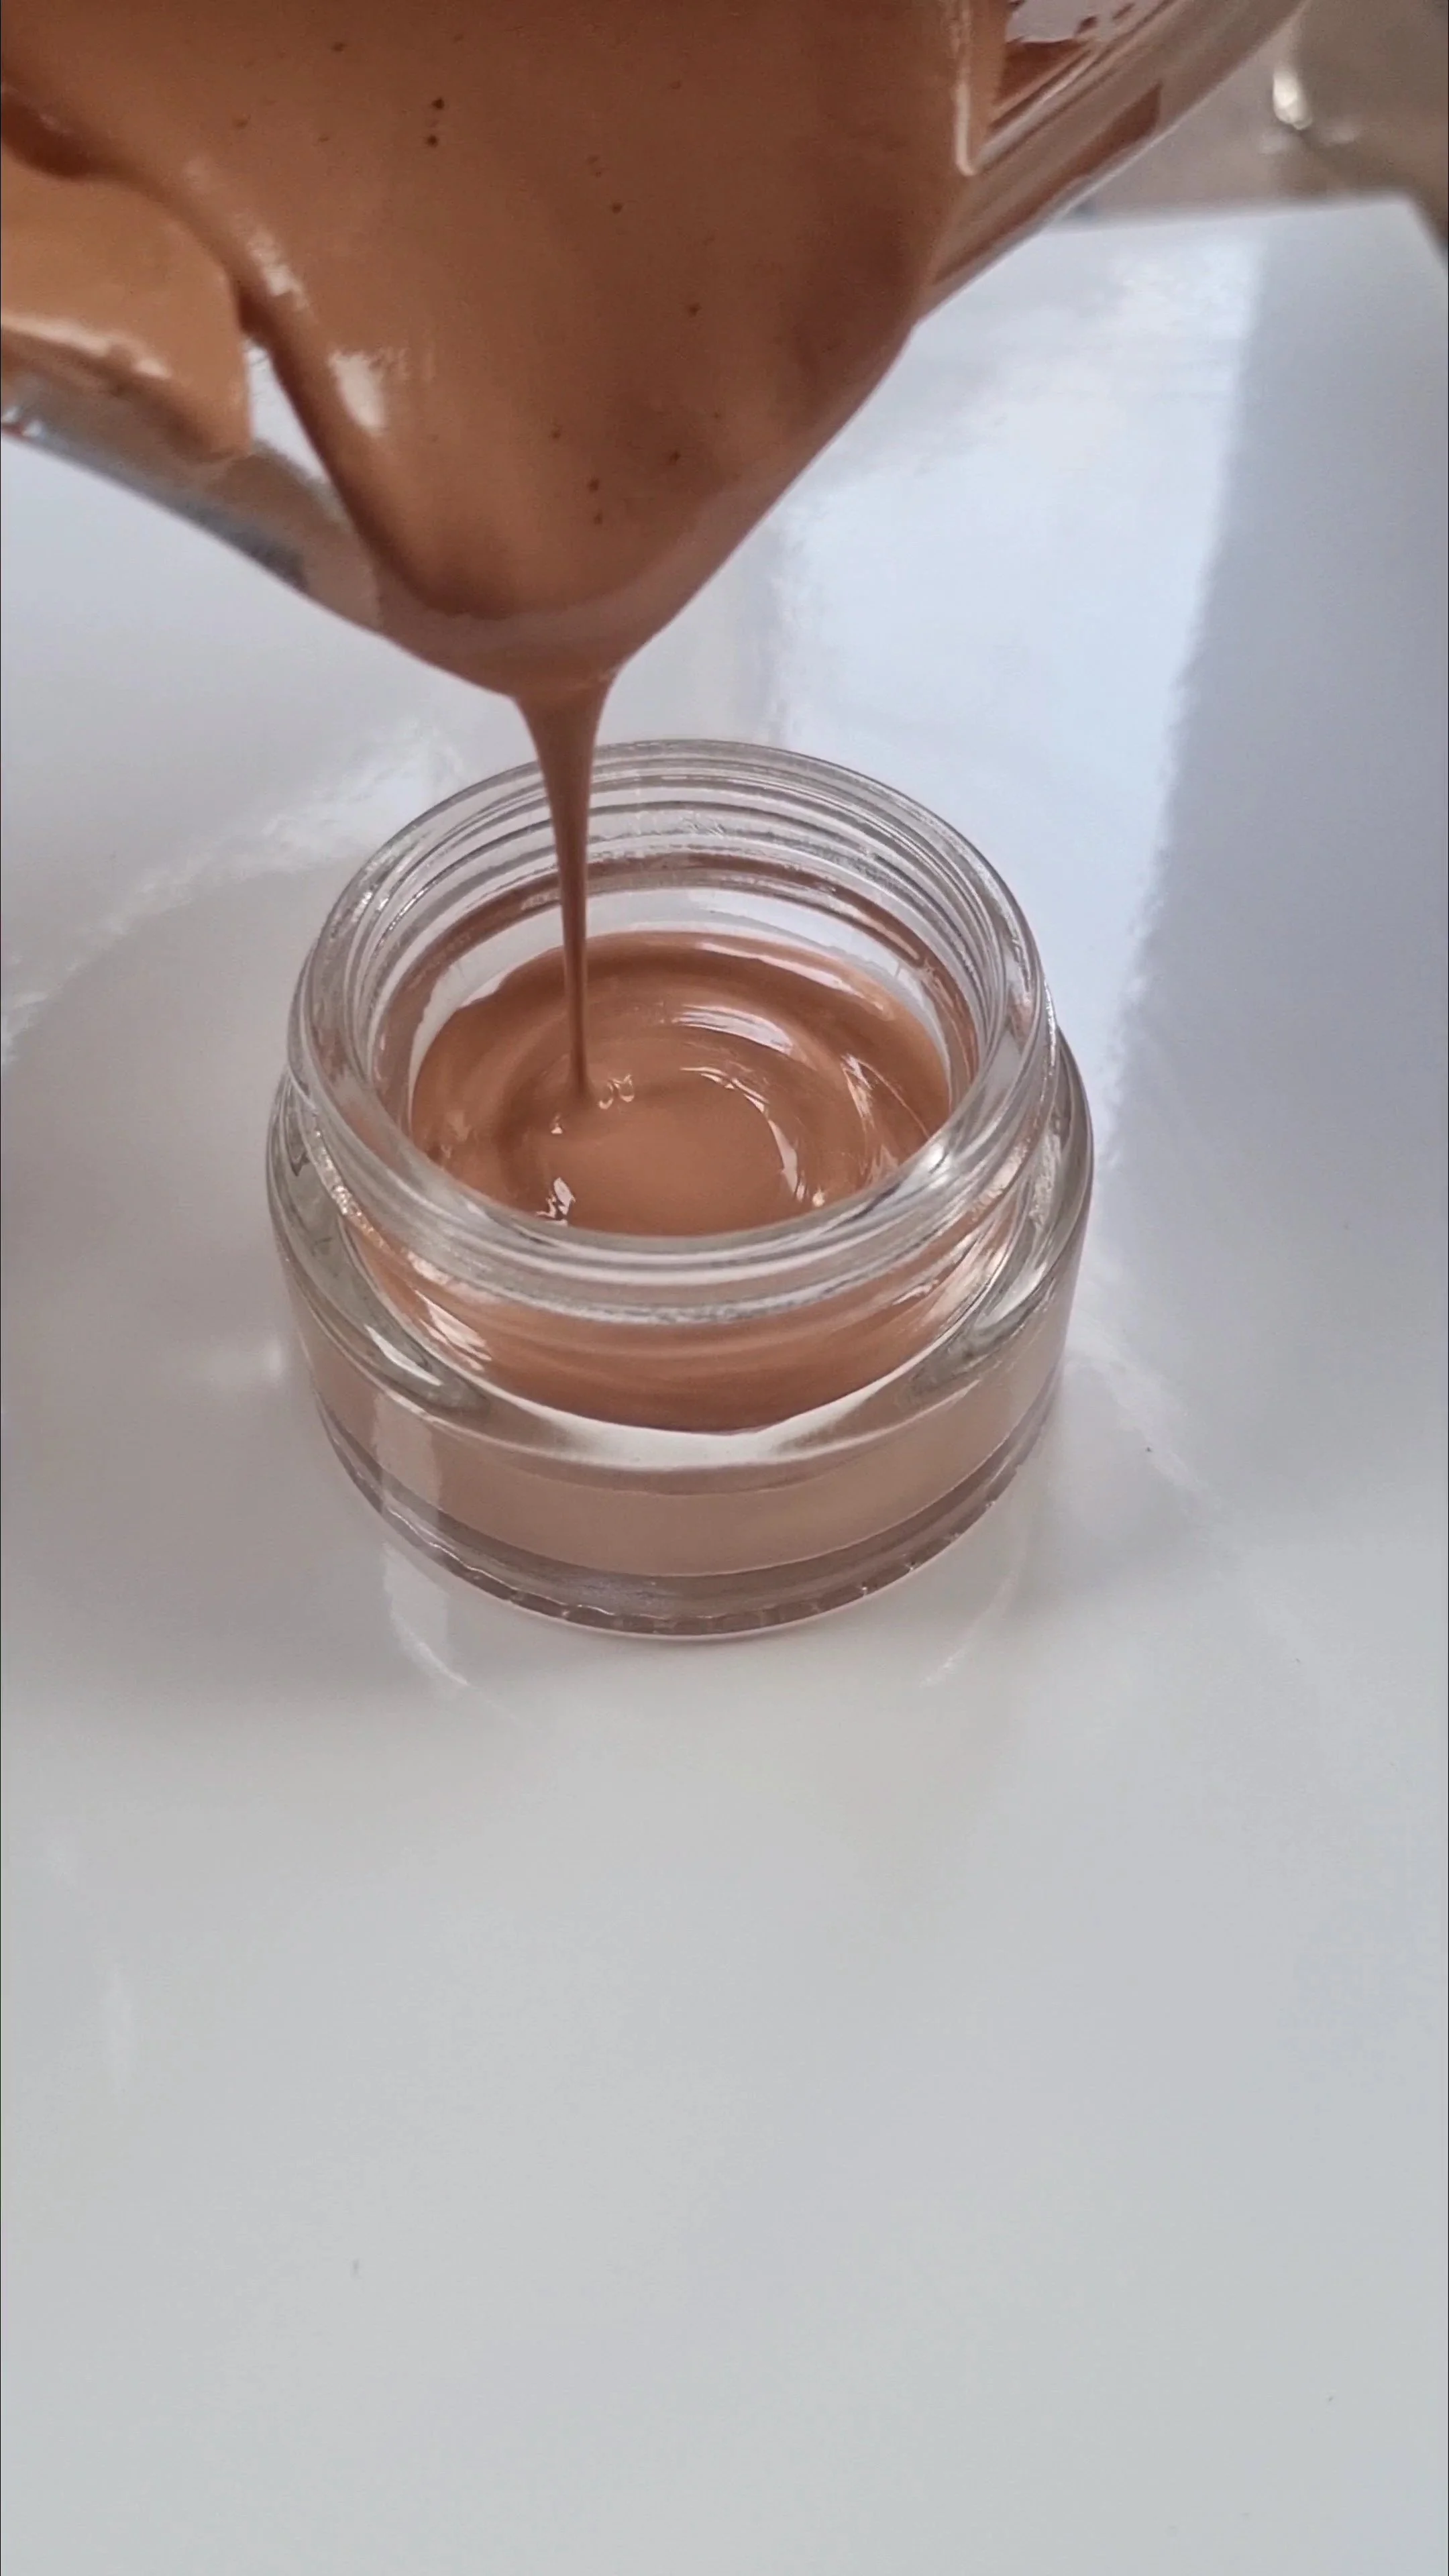

Eczema Relief Remedy DIY Homemade Soothing Cream Lotion Easy | Oat Cream For Eczema Psoriasis Recipe
Searching for an effective eczema relief remedy? Discover our easy DIY homemade soothing cream lotion, perfect for eczema and psoriasis relief. Learn how to make an oat cream for eczema at home with our simple recipe. This natural, gentle cream helps soothe irritated skin and reduce inflammation. Ideal for sensitive skin, this homemade DIY remedy uses nourishing ingredients to provide lasting relief. Click to get the step-by-step recipe and start your journey to healthier, more comfortable skin with this homemade eczema cream. Perfect for anyone looking for natural, effective skincare solutions.

Searching for an effective eczema relief remedy? Discover our easy DIY homemade soothing cream lotion, perfect for eczema and psoriasis relief. Learn how to make an oat cream for eczema at home with our simple recipe. This natural, gentle cream helps soothe irritated skin and reduce inflammation. Ideal for sensitive skin, this homemade DIY remedy uses nourishing ingredients to provide lasting relief. Click to get the step-by-step recipe and start your journey to healthier, more comfortable skin with this homemade eczema cream. Perfect for anyone looking for natural, effective skincare solutions.
Eczema can be managed with homemade remedies including acupressure, honey, and aloe vera gel. There are also other natural treatments for eczema, such as natural oils and colloidal oatmeal.
The most prevalent kind is called "atopic dermatitis," however people typically refer to it as "eczema."
People of all races and ethnicities can develop eczema. The skin may look cracked when someone has eczema. For lighter skin tones, the condition may seem red; for deeper skin tones, it may appear brown, purple, or grey.
Although there is no permanent cure for eczema, natural therapies and home cures can help relieve the dry, itchy skin that it can produce.

What To Do When Vitiligo Is Active & Spreading | What To Do When Diagnosed With Vitiligo Comprehensive Guide
What to Do When You're Diagnosed with Vitiligo: A Comprehensive Guide
What should you do when you have been diagnosed with vitiligo, and your vitiligo is active and spreading? Being diagnosed with vitiligo can be overwhelming, but you're not alone in this journey. What should you expect when you’ve been diagnosed with Vitiligo? Explore our comprehensive guide to understand vitiligo better and learn the crucial steps to take after your diagnosis. So, what happens after you have been diagnosed with Vitiligo? From scheduling consultations with vitiligo dermatologists and exploring the latest treatment options to adopting a balanced diet rich in skin boosting nutrients and engaging in stress reducing activities, we've got you covered. Click to read more and start your journey toward managing vitiligo with informed, proactive, and effective care. Boost your knowledge and confidence with our expert tips and advice.
What should you do when you have been diagnosed with vitiligo, and your vitiligo is active and spreading? Being diagnosed with vitiligo can be overwhelming, but you're not alone in this journey. What should you expect when you’ve been diagnosed with Vitiligo? Explore our comprehensive guide to understand vitiligo better and learn the crucial steps to take after your diagnosis. So, what happens after you have been diagnosed with Vitiligo? From scheduling consultations with vitiligo dermatologists and exploring the latest treatment options to adopting a balanced diet rich in skin boosting nutrients and engaging in stress reducing activities, we've got you covered. Click to read more and start your journey toward managing vitiligo with informed, proactive, and effective care. Boost your knowledge and confidence with our expert tips and advice.
The long term condition known as vitiligo causes pale in colour white spots to appear on the skin. The pigment in skin, called melanin, is what causes it. Although vitiligo can affect any part of the skin, it usually affects the hands, face, neck, and intimate areas of the body.
Because pale skin tones are more susceptible to sunburn, it's critical to use sunscreen with a high sun protection factor (SPF) and exercise additional caution when out in the sun.
It is most frequently found on the face, hands, feet, groin, armpits, and within the mouth.
It may also occasionally appear on your scalp or other areas with hair roots.

How Long Does Scar / Stretch Mark Camouflage Take To Work ? | Skin Camouflage FAQ
Scar & stretch mark camouflage in Bedford and beyond. Discover the timeline for scar healing, including the crucial role of patience, especially for darker scars requiring lightening. Learn how treating stretch marks on fairer skin can yield faster results. At Kandor Co in Bedford town we’re committed to providing a reassuring and friendly environment as we bring the magic of scar camouflage to you
If you're curious about the timeline for scar camouflage and the magic it holds, you've come to the right place. Today, let's explore the world of skin camouflage and address the question that lingers on everyone's mind – How long does it take for scar camouflage to work its wonders?
Understanding Scar Camouflage:
Scar camouflage is an art that goes beyond concealment; it's about embracing the beauty beneath the scars. At Kandor Co, nestled in the heart of Bedford and reaching out to surrounding areas, we're your partners on this incredible expedition. After the ink is applied, the area immediately becomes red and swollen, and the final results are not yet clear. You are able to see ink has been deposited, however with the presence of redness. The redness subsides after a day or two and a thin scab will form. After about a week the scab will shed and the area will be a little darker still. Soon after this, around another week, the final colour and camouflage retention will be visible.
The Timeline Unveiled:
Now, let's delve into the details. The timeline for skin camouflage is a journey, not a sprint. Luckily, for stretch marks and paler scars, this is a simple process and results are pretty timely, usually from around 3-4 weeks for healed results. Fairer skin seems to take less time for results to show up too.
For darker scars requiring scar lightening, patience becomes the key. Not an overnight miracle, this transformative process takes time and additional sessions, which is appreciated by most as they start reaping the rewards of the process. The main characteristic prohibiting fast healing is hyperpigmentation, which can vary in severity so timelines can alter for each individual.
Factors Influencing the Timeline:
Several factors influence the speed of scar camouflage:
1. Scar / Stretch Mark Type The nature of the scar or stretch mark plays a pivotal role. Darker scars may take significantly longer to heal, underscoring the importance of patience in the process. Red, deep stretch marks will also take a bit longer as they will need to be prepped and lightened with the possibility of an additonal session or two too.
2. Skin Type Each skin type responds uniquely. For those on the journey of treating only stretch marks, quicker results can be visible in around 3 to 4 weeks.
3. Aftercare Your commitment to aftercare significantly influences the process. Diligently following our guidelines accelerates the transformative journey.
4. Number of Sessions Multiple sessions may be required, spaced strategically to allow for gradual healing.
Stretch Marks vs. Scars:
Stretch marks, tend to respond more quickly than scars being camouflaged. While results can be seen in around 3 to 4 weeks, it's essential to note that scars, particularly darker ones, require additional time. Stretch marks, being more surface-level, often show faster improvements compared to the deeper healing needed for scars, and when hyperpigmentation is involved it means slow and steady progress will be made.
Reassurance and Support:
Embarking on the scar camouflage journey requires both excitement and patience. Rest assured, we are dedicated to guiding you every step of the way, fostering a reassuring and friendly environment.
Conclusion:
In the heart of Bedford and beyond, Kandor Co is not merely a beauty destination – it's a haven for transformation. If you're curious about stretch mark / scar camouflage and the time it takes to work, remember, patience is your ally. Every day brings you one step closer to unveiling the vibrant, confident you.
Ready to begin your scar camouflage adventure? Reach out to Keira on 07561026191 and let's unveil the magic together!